

Six Recipes That Make Plant-Forward Cooking Feel Effortless
Three mains, one slow-cooker project, one skillet side, and a dessert that doubles as breakfast. Everything you need for a genuinely great week of cooking.
This week’s recipe collection covers a wider range than any single meal plan usually does: a basil pesto that ditches pine nuts entirely, a grilled cheese that doesn’t melt, a mushroom that eats like a steak, a slow cooker running all day toward something that will make your kitchen smell extraordinary, a skillet of caramelized mushrooms that comes together in under 15 minutes, and a fruit dessert that requires no heat whatsoever. The common thread is that all six are built around plant foods, are genuinely satisfying, and don’t ask much of you in terms of time or technique. Don Lichterman’s take on each one follows, adapted for the Sustainable Action Now kitchen.
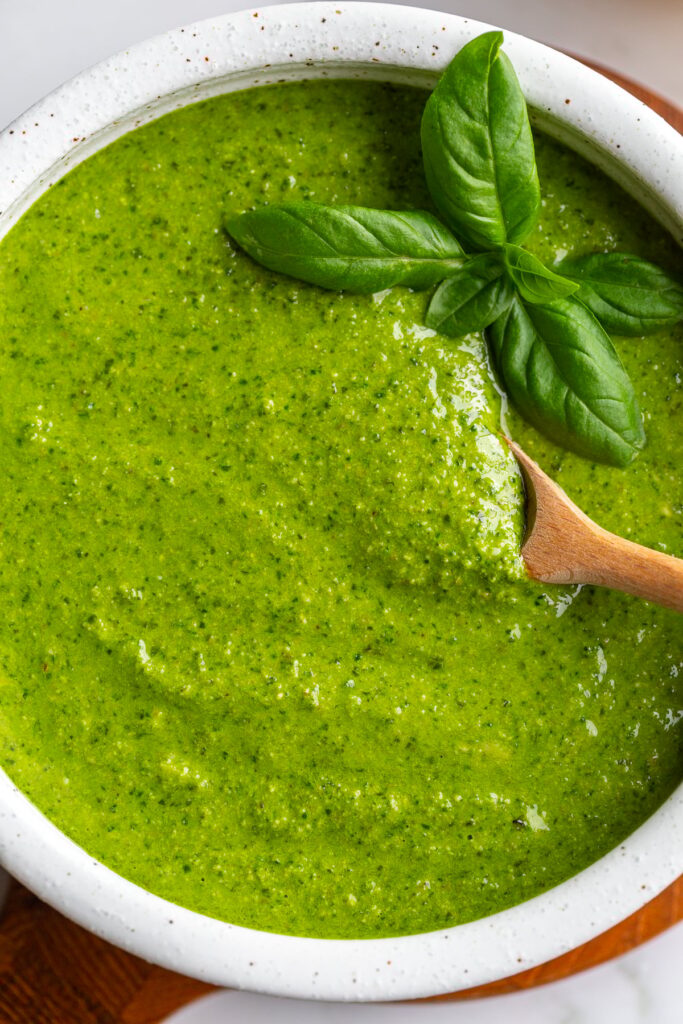
Homemade Walnut Pesto
Pine nuts are expensive enough that most people skip homemade pesto entirely and reach for the jar instead, which is a shame because fresh pesto made at home is incomparably better than anything shelf-stable. Walnuts solve the cost problem completely. They blend into a pesto that is just as creamy and rich as the pine nut version, with a slightly deeper, earthier quality that is genuinely its own thing rather than a compromise. If you keep walnuts in the house, which most people do, you’re ten minutes away from fresh pesto whenever basil is in season and cheap at the market.
What You Need
- Walnuts: the base; toast first in a dry skillet for a richer, deeper flavor
- Fresh garlic: start with 3 cloves, add more if you like it bold
- Fresh lemon juice: brightens everything and slows the basil from browning; add zest for extra brightness
- Fresh basil leaves: pack the measuring cups tightly for full flavor
- Parmesan cheese, freshly grated: adds savory depth; swap for nutritional yeast to make it fully vegan
- Extra virgin olive oil: use something you’d enjoy on its own; more for a thinner sauce, less for a spread
- Salt and black pepper: season at the end, after tasting, since the parmesan brings its own saltiness
- Pulse the walnuts, garlic, and lemon juice. Add all three to the food processor and pulse about 10 times until the walnuts are broken into coarse pieces but not yet a paste.
- Add the basil and parmesan. Add both to the processor and pulse another 10 times until the basil breaks into small pieces. Scrape down the sides of the bowl.
- Stream in the olive oil. With the processor running on low, drizzle the oil in a slow, steady stream until the pesto comes together into a smooth sauce. Taste, then adjust with salt, pepper, or more oil to reach your preferred consistency.
Tips That Matter
- Toast the walnuts first if you have 5 minutes. The flavor difference is significant and worth it.
- Pulse, don’t run. Continuous processing turns the basil bitter and the texture pasty. Short bursts are the right approach.
- Press plastic wrap directly onto the surface of leftover pesto to block air contact and preserve the bright green color.
Grilled Halloumi Cheese
Halloumi is the cheese that doesn’t melt. That sounds like a limitation, but it is the exact feature that makes it one of the most useful ingredients in a plant-forward summer kitchen. Slice it thick, marinate it in olive oil and zaatar, and put it directly on a hot grill for a minute per side. What comes off is golden, firm, squeaky in the best possible way, and deeply savory. It works as a standalone appetizer alongside cherry tomatoes, as a main course on a grain bowl, or tucked into a flatbread with whatever vegetables happen to be in the fridge.
Halloumi originated in Cyprus, traditionally made from a mixture of sheep’s milk and goat’s milk, though cow’s milk versions are now common and widely available. Its unusually high melting point, which is what allows it to grill without losing its structure, comes from its particular protein and fat composition, and the squeaking sound it makes against your teeth is considered a mark of quality and freshness, not a flaw. The saltiness of the cheese means it absorbs whatever marinade you give it readily, and a simple combination of olive oil and zaatar is more than enough to make it genuinely excellent.
What You Need
- Halloumi: find it in the specialty cheese section of most grocery stores; let it come to room temperature and pat dry before marinating
- Extra virgin olive oil: helps the seasoning adhere and prevents the cheese from drying out on the grill
- Zaatar or Italian seasoning: zaatar is earthy and herby and the better choice here; Italian seasoning works as a substitute
- Canola oil spray: use on grill grates to prevent sticking
- Slice the halloumi into planks approximately one-third of an inch thick.
- Marinate. Toss the slices in olive oil and seasoning. Let them sit for at least one hour, or overnight for deeper flavor absorption.
- Grill. Preheat the grill or grill pan to 400°F, then reduce to medium heat. Place the slices on a diagonal for defined grill marks and cook approximately 1 minute per side until golden with char lines.
- Serve immediately. Finish with an extra sprinkle of zaatar and serve warm alongside cherry tomatoes or fresh vegetables. Halloumi firms back up as it cools, so serve right off the grill.
Tips That Matter
- Don’t skip the marinating time. Even an hour makes a substantial difference in how much flavor the cheese absorbs.
- Oil the grill grates well. Halloumi sticks more readily than meat, so thorough oiling before placing is important.
- Watch it closely. One minute per side is all that’s needed and the window between golden and overcooked is narrow.
Lion’s Mane Mushroom Steak with Garlic Herb Butter
Lion’s mane is the mushroom that surprises people. Its shaggy, white, layered exterior looks nothing like what most people picture when they think of a cooking mushroom, and its texture after a proper sear in a hot cast iron pan is denser and more satisfying than any other variety available. The key word is “proper sear,” meaning high heat, enough butter to facilitate actual browning, and the patience to let the moisture cook out before expecting a crust to form. Press it firmly against the pan. Leave it alone for several minutes. Flip it once, add soy sauce for a glossy, caramelized glaze, and finish with garlic herb butter that melts into every surface of the still-hot mushroom as it comes off the heat.
Lion’s mane is available at most farmers markets and increasingly at specialty grocery stores. You’ll need roughly one pound of mushrooms for a satisfying main course serving, which works out to approximately two large mushrooms. They can be seared whole for a dramatic single-serving presentation or sliced crosswise into one-inch rounds for easier portioning and slightly faster cooking. Either approach produces the same deeply savory, meaty result.
What You Need
- Lion’s mane mushrooms: about 1 pound, roughly 2 mushrooms; wipe clean with a damp cloth, never rinse
- Olive oil: helps the butter reach high heat without burning
- Butter: creates the golden-brown sear crust
- Soy sauce: added after the flip for a glossy, caramelized, savory finish
- Salt and black pepper: go light on salt since the soy sauce brings substantial seasoning
- Garlic herb butter: softened butter mixed with garlic, thyme, rosemary, and parsley or oregano; made ahead and added at the finish
- Make the garlic herb butter. Stir together softened butter with minced garlic, fresh thyme, rosemary, and parsley or oregano. Set aside.
- Prep the mushroom. Trim any dark or dried spots from the base and wipe clean. Leave whole for steakhouse presentation or slice into 1-inch rounds for portioned servings.
- Sear. Heat olive oil and 1 tablespoon of butter in a cast iron or heavy skillet over medium-high heat. Add the mushroom and press firmly with a spatula. Leave undisturbed for 3 to 5 minutes until deeply golden brown.
- Flip and glaze. Turn the mushroom and immediately drizzle soy sauce over the top and around the edges of the pan. Let it sizzle and caramelize for 3 to 5 more minutes, spooning the pan juices back over the top. Season with pepper.
- Finish with butter. Remove from heat and immediately place the garlic herb butter on top of the hot mushroom, letting it melt over the surface. Spoon any pooled butter from the pan back over before serving.
Tips That Matter
- Give the moisture time to cook off. Lion’s mane releases significant liquid before it begins to brown. Don’t rush that stage.
- Add the soy sauce after flipping, not before. This is specifically what produces the glossy, caramelized finish rather than steaming the mushroom.
- Avoid rinsing. Water absorbed by the mushroom before cooking prevents the crust from forming and makes the texture rubbery rather than meaty.
Slow Cooker Apple Butter
Apple butter is one of those slow cooker projects that pays for itself in kitchen smell alone, and everything else it produces is a bonus. Five pounds of apples, brown sugar, cinnamon, nutmeg, vanilla, and a full day on low heat produce something deeply concentrated, warm, and spreadable that is better than anything commercially available in the same category. The variety mix matters: sweeter apples like Fuji, Gala, and Honeycrisp provide the body and natural sugar, while Granny Smith contributes the tartness that keeps the result from being cloying. Use all of one kind if that’s what you have, but a mix produces a more complex, interesting result.
What You Need
- Apples: 5 pounds, diced; use a mix of sweet and tart varieties for the most balanced flavor
- Brown sugar: adds richness and depth; cut in half or reduce to taste for a less sweet result
- Cinnamon and nutmeg: the essential warm spice combination
- Vanilla extract: not traditional but rounds out the flavor beautifully; swap for a splash of bourbon if preferred
- Salt: balances the sweetness and sharpens the other flavors
- Prep the apples. Peel, core, and dice the apples into roughly even pieces. You’ll need approximately 5 pounds of diced fruit, which works out to about 5¾ pounds of whole apples before peeling and coring.
- Combine and cook. Add the diced apples, brown sugar, cinnamon, nutmeg, and salt to the slow cooker. Stir to combine. Cook on high for 1 hour, then reduce to low and cook for 8 to 10 hours, stirring occasionally if you’re nearby.
- Finish uncovered. Stir in the vanilla extract, then remove the lid and cook on low for 1 more hour to allow excess moisture to evaporate and the mixture to thicken to a deep, concentrated brown.
- Blend. Use an immersion blender directly in the slow cooker insert for a smooth, creamy texture. A standard blender works too; handle hot liquid carefully and work in batches.
Tips That Matter
- Mix apple varieties for the most layered flavor. Sweetness from one variety and tartness from another creates a more interesting result than any single type alone.
- Start with less sugar. Taste near the end of cooking and adjust, because apple sweetness varies significantly by variety and ripeness.
- Crack the lid to thicken. If the butter isn’t reducing fast enough, prop the lid slightly ajar to allow more moisture to escape.
- Skip the peeling if you’re blending. An immersion blender handles apple skins without leaving texture, and the skins add fiber and color.
Sautéed Chestnut Mushrooms with Garlic and Thyme
Chestnut mushrooms are the variety that shows up at farmers markets in dense, photogenic clusters with deep brown caps and a firm, nutty character that holds up to high-heat cooking in ways that softer mushrooms don’t. The key to getting them right is a hot pan, enough fat, and the discipline to leave them alone once they’re in. The first several minutes without stirring are what build the caramelized crust that makes a sautéed mushroom worth eating. After that, garlic and fresh thyme go in at the very end, just long enough to become fragrant, and the whole thing comes together in under 15 minutes. White wine, if you want it, goes in after the initial sear and adds a depth of flavor as it reduces against the hot pan surface.
What You Need
- Chestnut mushrooms: trim the tough base of the cluster and separate or slice before cooking; wipe clean with a damp cloth, never rinse
- Butter: creates the rich, caramelized coating as mushrooms cook
- Olive oil: prevents the butter from burning at high heat
- Garlic: added at the very end to prevent burning
- White wine: optional, deglazes the pan and adds depth of flavor
- Fresh thyme: earthy and aromatic, added at the finish
- Salt and black pepper: to taste, added at the end
- Prep the mushrooms. Trim the tough base where the cluster was attached. Separate into individual pieces or slice as preferred. Wipe clean with a damp cloth.
- Sear. Melt butter and olive oil together in a large skillet over medium-high heat. Add the mushrooms in a single layer and cook completely undisturbed for 3 to 4 minutes, allowing a deep golden crust to form. Stir and cook for another 2 to 3 minutes until caramelized throughout.
- Finish. Pour in the white wine if using and let it bubble and reduce for about a minute. Add the garlic and fresh thyme and stir for 1 final minute, just until fragrant. Season with salt and pepper and serve warm.
Tips That Matter
- Don’t crowd the pan. Mushrooms need space in a single layer to sear rather than steam. Use a large pan or work in batches.
- Leave them alone. The undisturbed 3 to 4 minutes of initial cooking is specifically what produces caramelization. Stirring too early destroys that window.
- Add garlic late. It burns very quickly and needs only the final minute of cooking to develop flavor without turning bitter.
- Never rinse mushrooms. Water soaked into the flesh before cooking turns to steam in the pan and prevents browning.
Macerated Strawberries and Blueberries with Orange and Vanilla
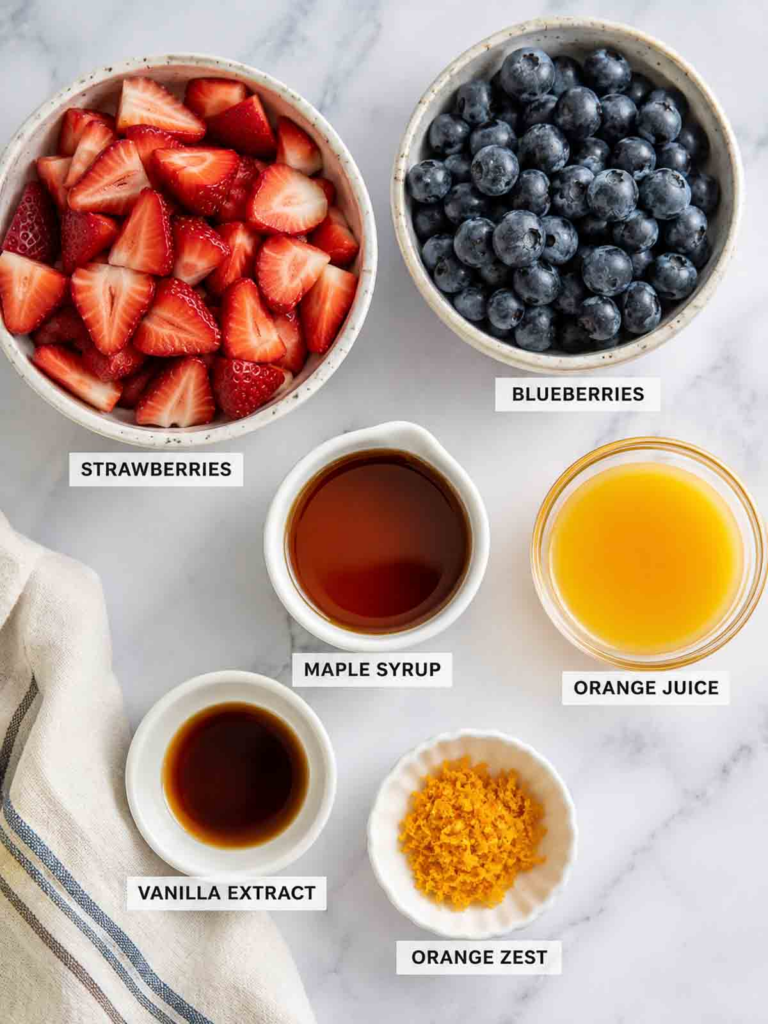
Maceration is the simplest thing you can do to fruit, and it produces a result that is significantly better than raw berries alone. The process is nothing more than coating the fruit in something sweet and acidic, then letting time do the work. The berries release their natural juices into the liquid, the liquid softens slightly into the fruit, and what you have after an hour in the refrigerator is a fresh, intensely fruity mixture that’s more than the sum of its parts. Maple syrup and fresh orange juice are the foundation here, with orange zest and vanilla extract adding dimension. Spoon the result over waffles, pancakes, oatmeal, yogurt, or ice cream. It works equally well on all of them and keeps in the refrigerator for several days.
- Wash and prep the fruit. Rinse strawberries and blueberries under cool running water. Wash the orange as well, since you’ll be using the zest. Remove strawberry stems and slice into bite-sized pieces.
- Prepare the orange. Finely grate approximately 1 teaspoon of zest from the orange, then cut it in half and squeeze out about one-quarter cup of juice. A citrus press or juicer helps separate juice from seeds cleanly.
- Combine. Place the sliced strawberries and blueberries in a quart-sized mason jar or other airtight container. Pour the orange juice, maple syrup, vanilla extract, and orange zest over the fruit.
- Coat and macerate. Secure the lid and gently shake the jar until the berries are evenly coated. Avoid vigorous shaking to preserve the fruit’s shape. Refrigerate for at least 1 hour before serving.
- Serve. Spoon the berries and their accumulated juices over waffles, pancakes, oatmeal, yogurt, or dessert.
Variations Worth Trying
- Reduce the sweetness by cutting the maple syrup or omitting it entirely. The orange juice provides enough acid and natural sugar to macerate the fruit on its own.
- Swap in raspberries, blackberries, sliced peaches, or nectarines depending on what’s in season.
- Add fresh mint, a pinch of cinnamon, or extra vanilla for different flavor directions.
- Finish with chopped pecans, walnuts, or granola just before serving for texture contrast.
The SAN Approach to Plant-Forward Cooking
Every recipe on this page is built on whole plants and honest ingredients. None of them ask you to compromise on flavor in exchange for the environmental benefit of eating less meat. Walnut pesto that costs a third the price of the pine nut version. A mushroom that eats like a steak. Berries that become dessert and breakfast in the same jar. This is what sustainable eating looks like when it’s done right: genuinely better food, made from ingredients that cost less and cost the planet less too.
Crockpot Apple Butter
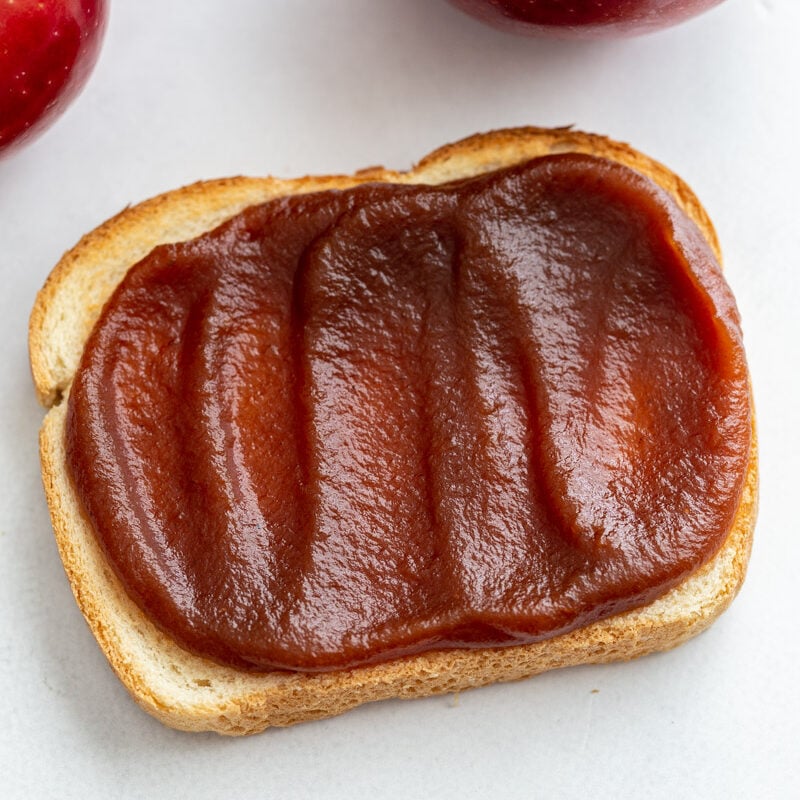
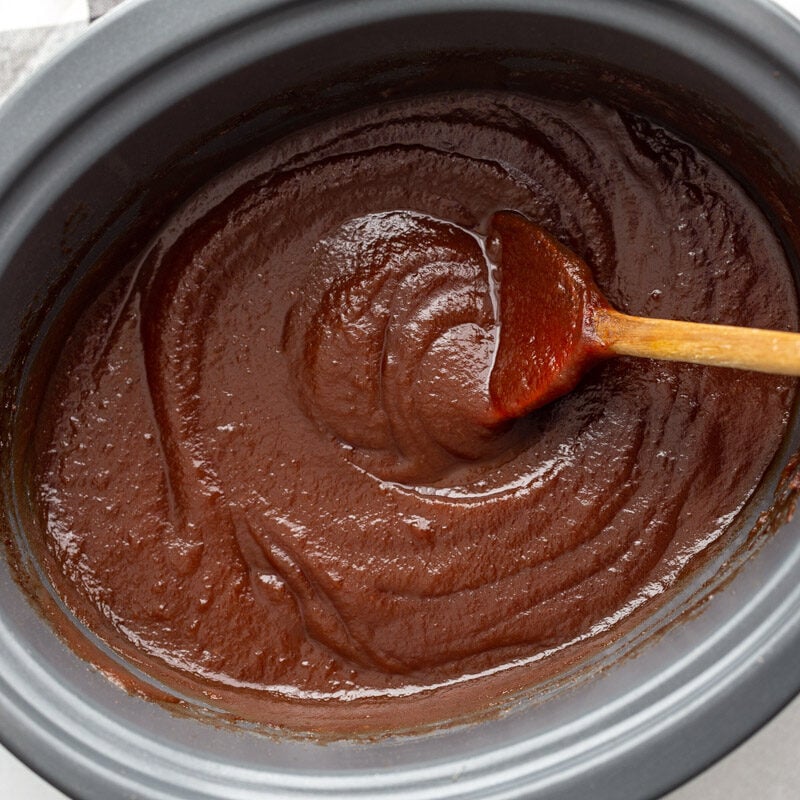
This Crockpot Apple Butter recipe is rich, smooth, and deeply spiced, cooked low and slow until thick and caramelized. It’s made with just 6 simple ingredients and your slow cooker does almost all the work.
Ingredients
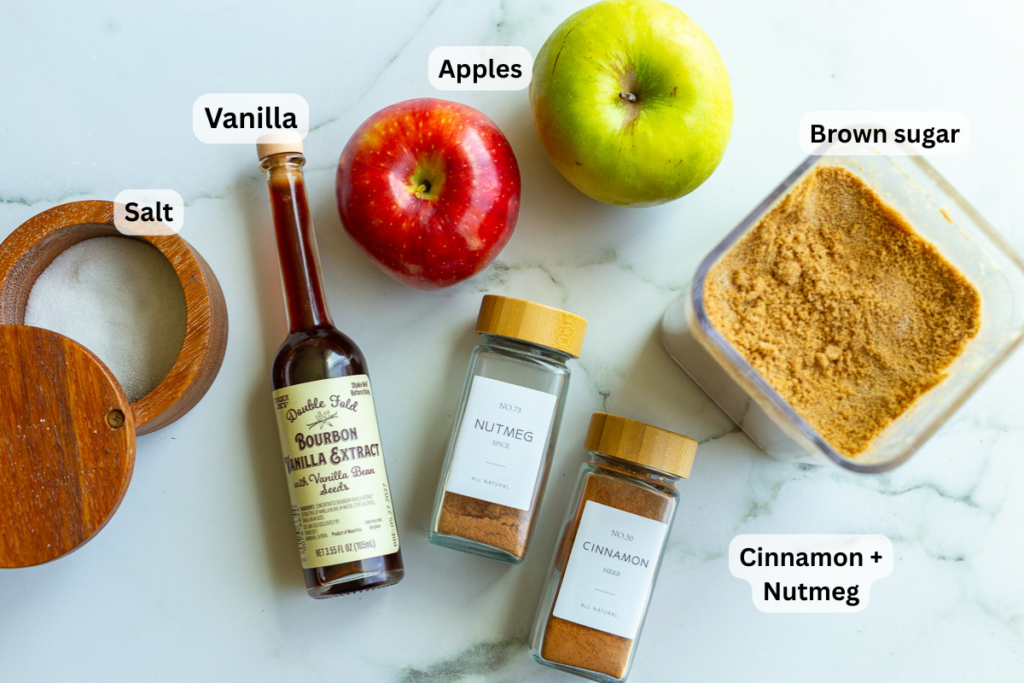
- 5 pounds apples peeled, cored, and rough diced** see note for varieties
- 1 ½ cups brown sugar packed
- ½ teaspoon salt
- 2 teaspoons cinnamon
- 1 teaspoon vanilla extract
- ¼ teaspoon nutmeg
Instructions
- Add the diced apples into a 6-quart or larger Crockpot. Mix in the remaining ingredients minus the vanilla: brown sugar, salt, cinnamon, and nutmeg and mix so that the apples are evenly coated.5 pounds apples, 1 ½ cups brown sugar, 1/2 teaspoon salt, 2 teaspoons cinnamon, 1/4 teaspoon nutmeg
- Cover and set the slow cooker to HIGH for 1 hour. Reduce the heat to LOW and cook for 10 hours. It’s not absolutely necessary, but I like to give it a good stir every 1-2 hours.
- After the 10 hours, remove the lid and stir in the vanilla. Let it cook, uncovered, for 1 additional hour to cook off some of the moisture. Remove from the heat and stir in the vanilla.1 teaspoon vanilla extract
- You can serve the apple butter as is OR blend it so that it’s creamy. The best way to do this is using an immersion blender but a regular blender will also work (just be very careful when transferring and blending the hot apple butter!). Serve and ENJOY!
Notes
**I used freshly picked Oregon apples with lots of crimson reds, Ida Red apples with a few Cortland thrown in as well. You can use a variety of different apples and you can use several different kinds of apples in one apple butter recipe. Other varieties that work well: braeburn, Cortland, Fuji, grimes golden, jonamac, liberty, and McIntosh
Storage Instructions
- Fridge: Store in an airtight container for up to 2–3 weeks.
- Freezer: Freeze in jars or containers for up to 6 months.
- Canning: Apple butter can be canned using proper water bath canning procedures (link out if you don’t want to include full directions).
Nutrition
Calories: 61kcal | Carbohydrates: 16g | Protein: 0.2g | Fat: 0.1g | Saturated Fat: 0.02g | Polyunsaturated Fat: 0.03g | Monounsaturated Fat: 0.005g | Sodium: 32mg | Potassium: 72mg | Fiber: 1g | Sugar: 14g | Vitamin A: 31IU | Vitamin C: 3mg | Calcium: 11mg | Iron: 0.1mg
The Crockpot Apple Butter (Easy Slow Cooker Recipe) is a Food with Feeling Recipe.
Easy Walnut Pesto
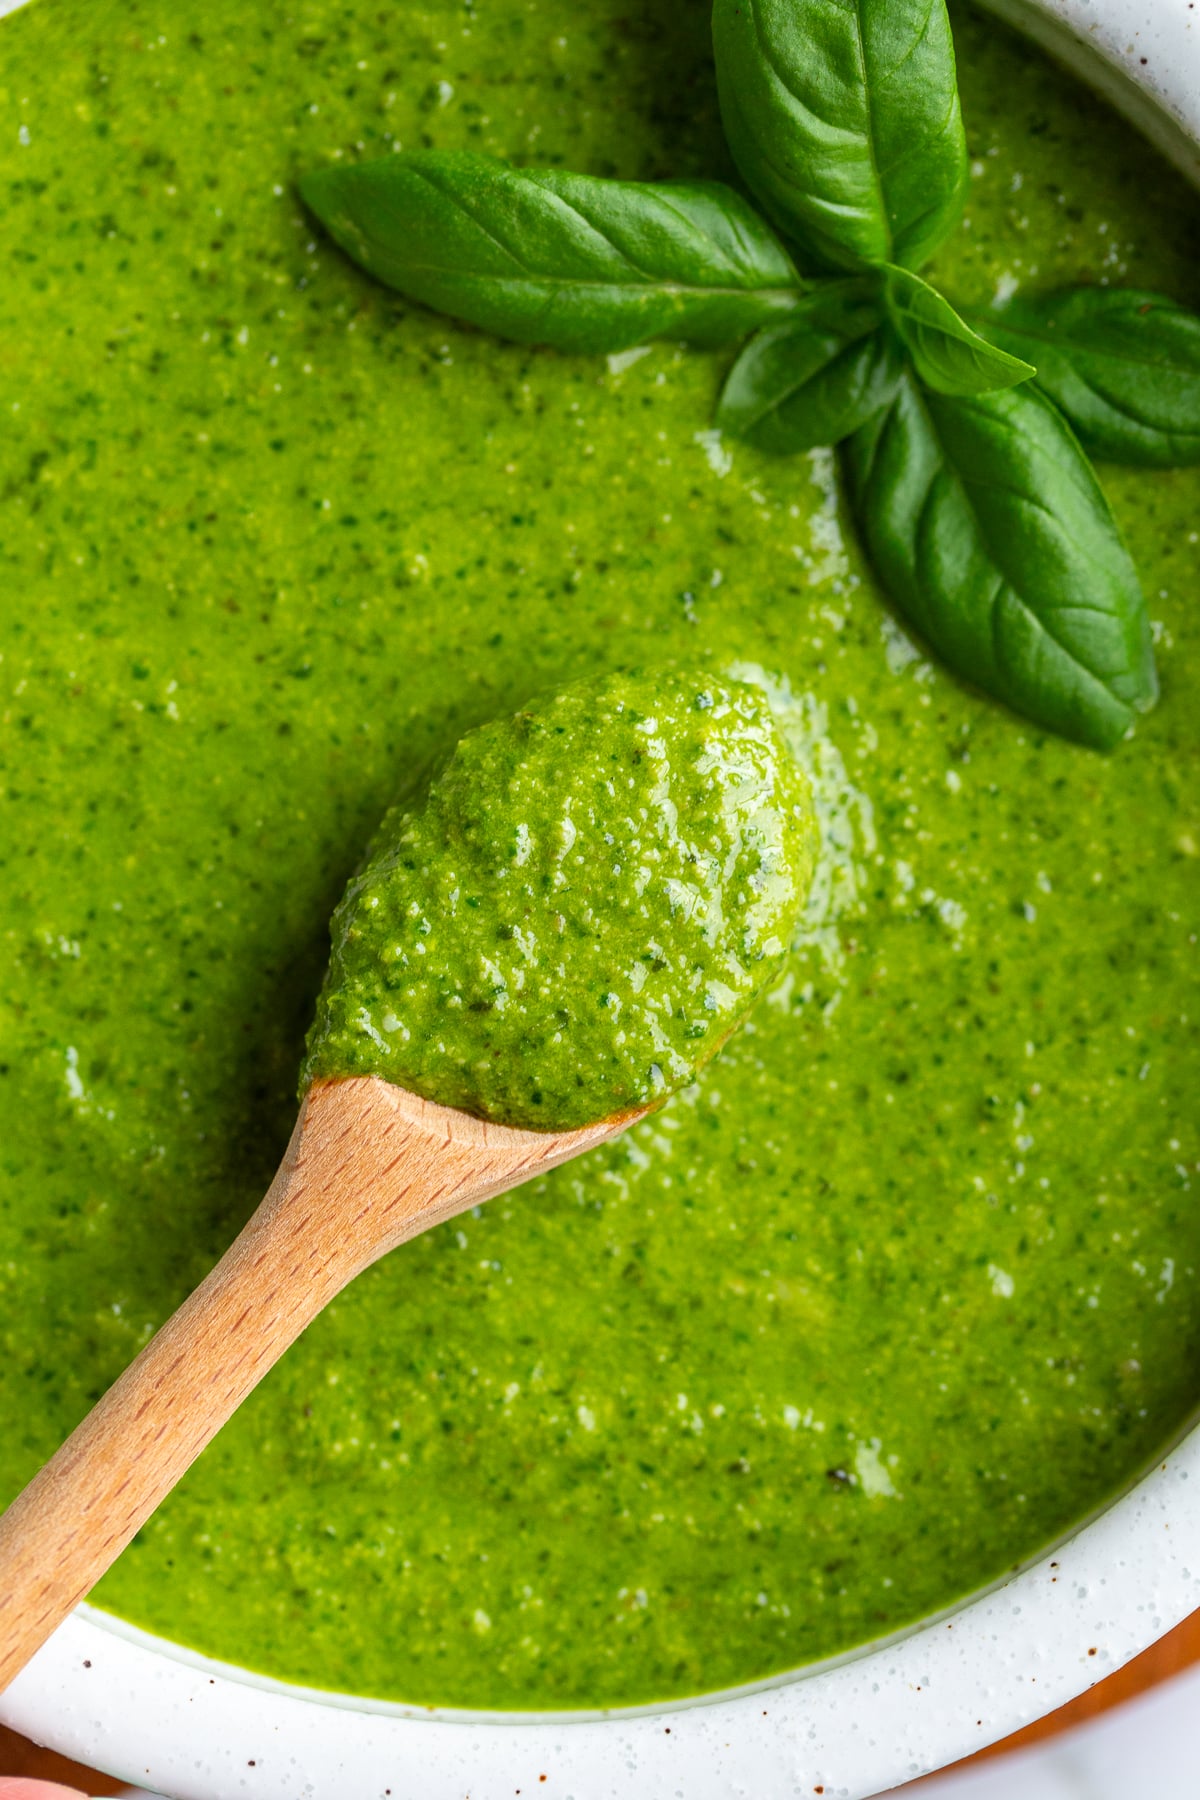
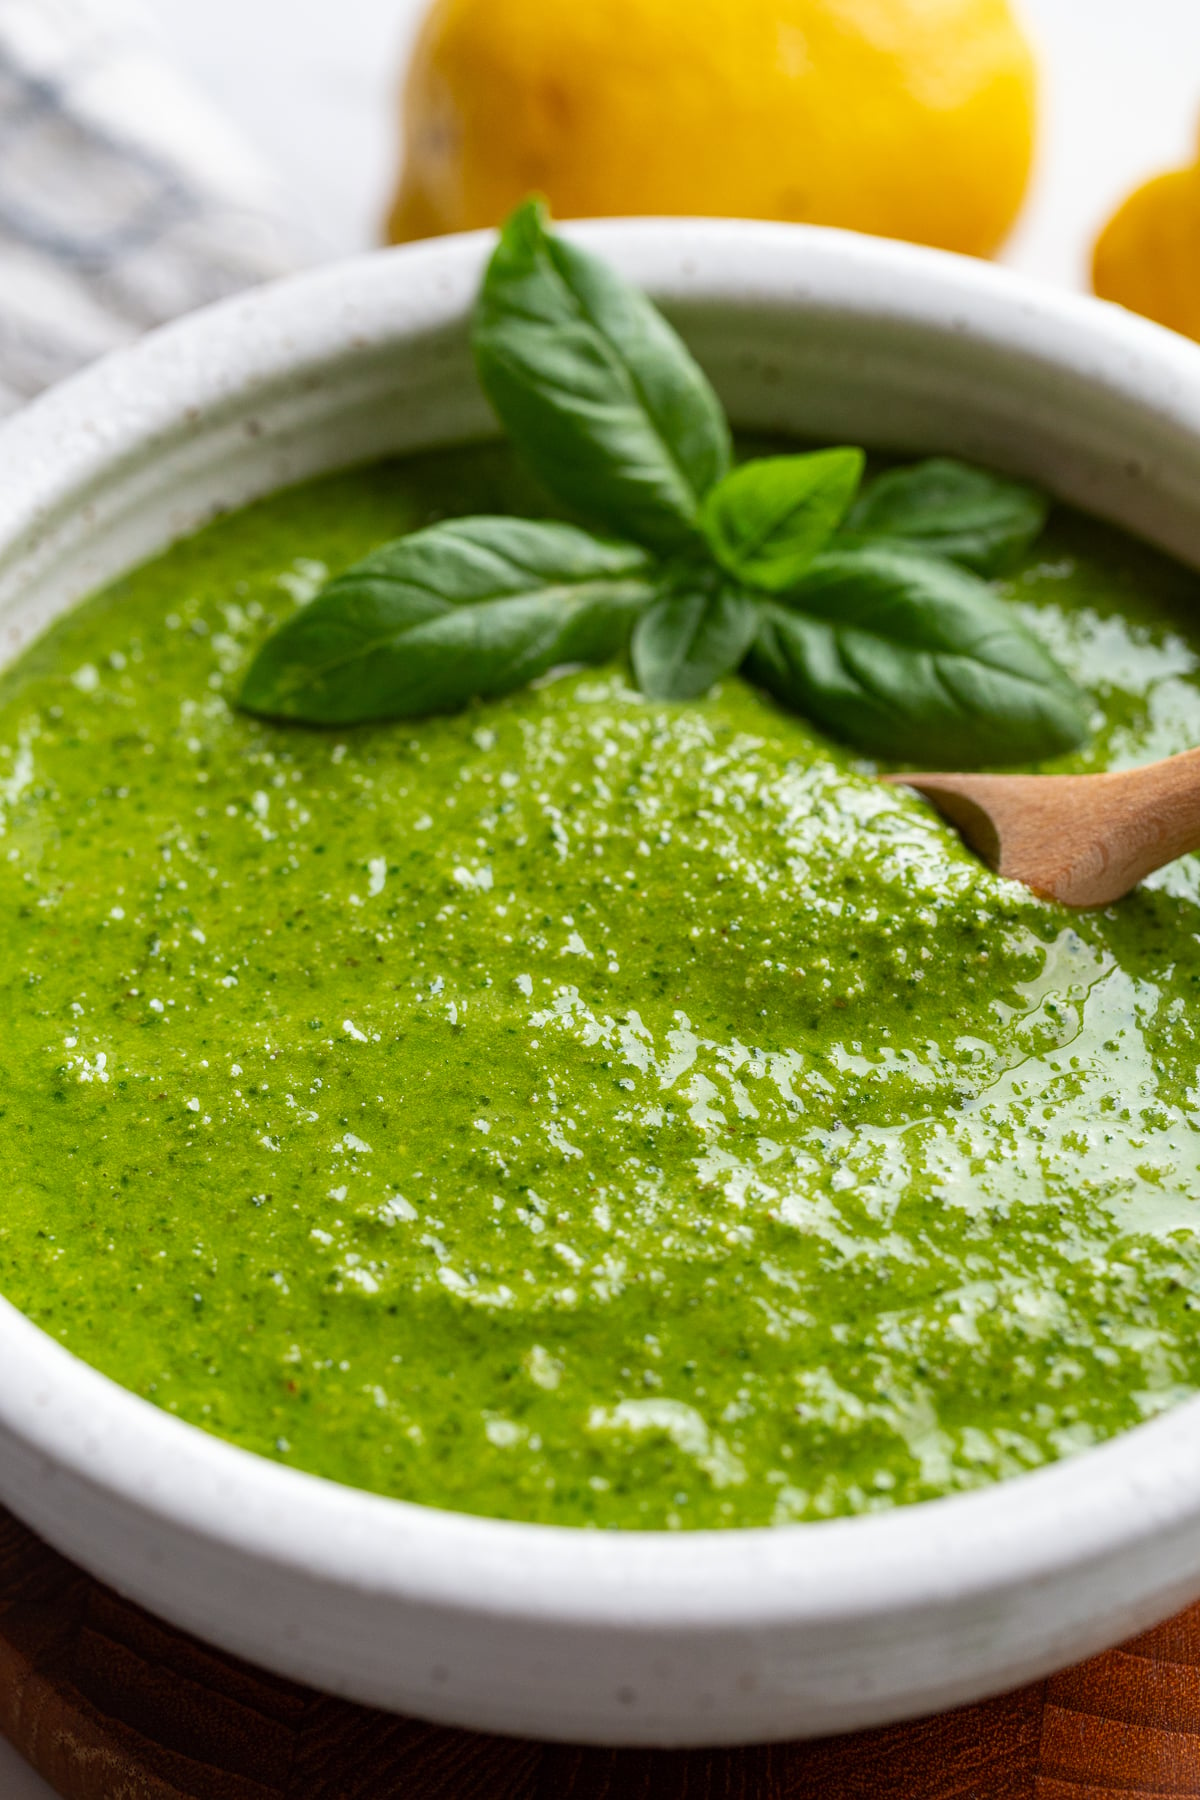
This Walnut Pesto Recipe swaps pricey pine nuts for walnuts without sacrificing any of that rich, garlicky flavor. It comes together in one food processor in about 10 minutes and is perfect tossed with pasta, spread on sandwiches, or spooned over roasted vegetables.
Ingredients
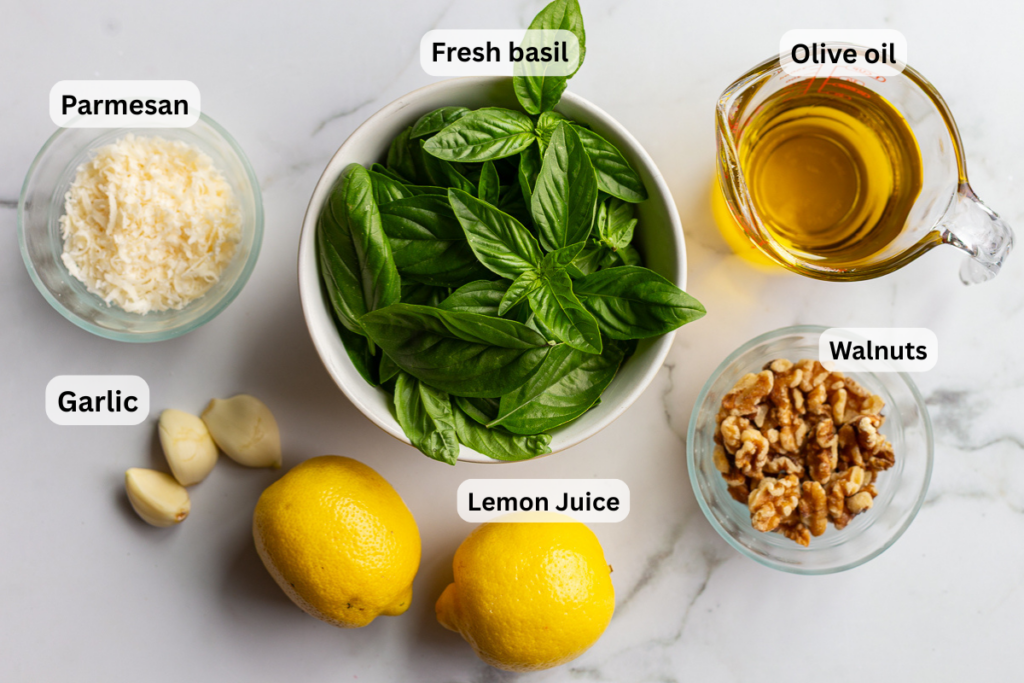
- ½ cup walnuts
- 3-4 cloves garlic*
- 1 lemon juiced (about 2-3 tablespoons)
- 3 cups fresh basil leaves tightly packed
- ⅓ cup parmesan cheese grated or shredded
- ½-⅔ cup extra virgin olive oil plus more as desired
Instructions
- (Optional but highly recommended): Toast the walnuts in a dry skillet for a few minutes until they start to darken in color. This step is totally optional and I’ve made pesto many times without toasting the nuts. But I love the extra flavor.
- Add the nuts, garlic, and lemon juice to the bowl of a food processor and pulse until they are broken up – about 10 times. Next, add the basil and parmesan and pulse until the basil is broken into small pieces – about 10 pulses.
- With the food processor on low speed, slowly drizzle in ⅓ cup of olive oil. Add more olive oil as desired for a smoother consistency.
- Season with salt and pepper to taste.
Notes
Garlic: you can leave it out all together or just add in as much as you’d like. I typically like a lot but anywhere between 1-5 cloves would work well.
Storage: Homemade pesto will stay fresh for about 5–7 days in an airtight container. Press a thin layer of olive oil on top to help prevent browning.
Nutrition
Calories: 382kcal | Carbohydrates: 6g | Protein: 6g | Fat: 39g | Saturated Fat: 6g | Polyunsaturated Fat: 10g | Monounsaturated Fat: 22g | Cholesterol: 6mg | Sodium: 136mg | Potassium: 172mg | Fiber: 2g | Sugar: 1g | Vitamin A: 1024IU | Vitamin C: 18mg | Calcium: 156mg | Iron: 1mg
The Homemade Walnut Pesto is a Food with Feeling Recipe.
Grilled Halloumi
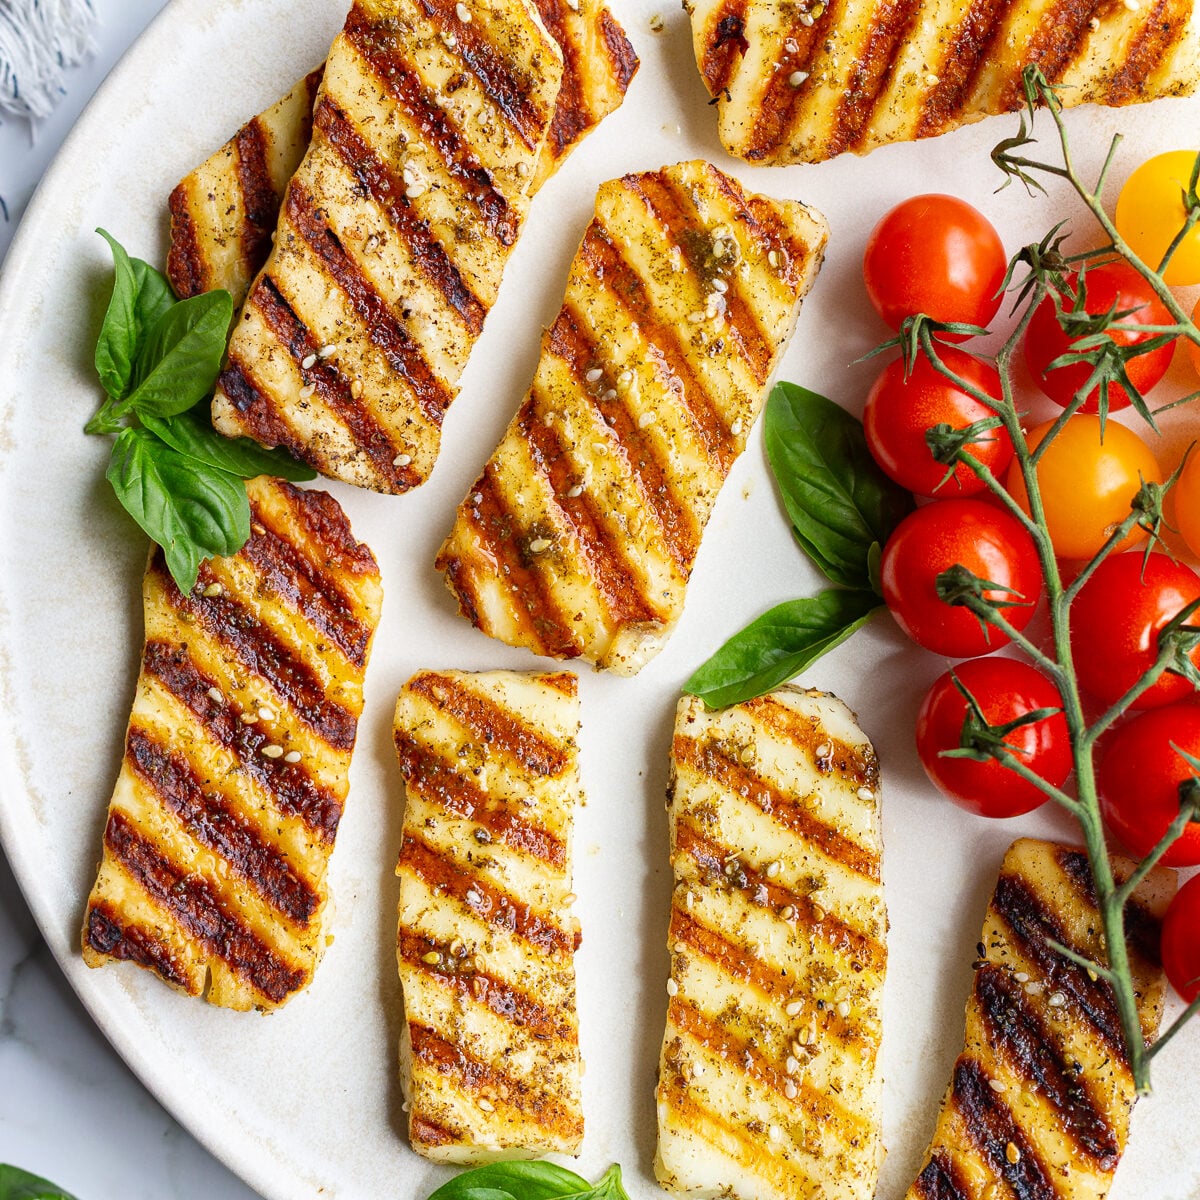
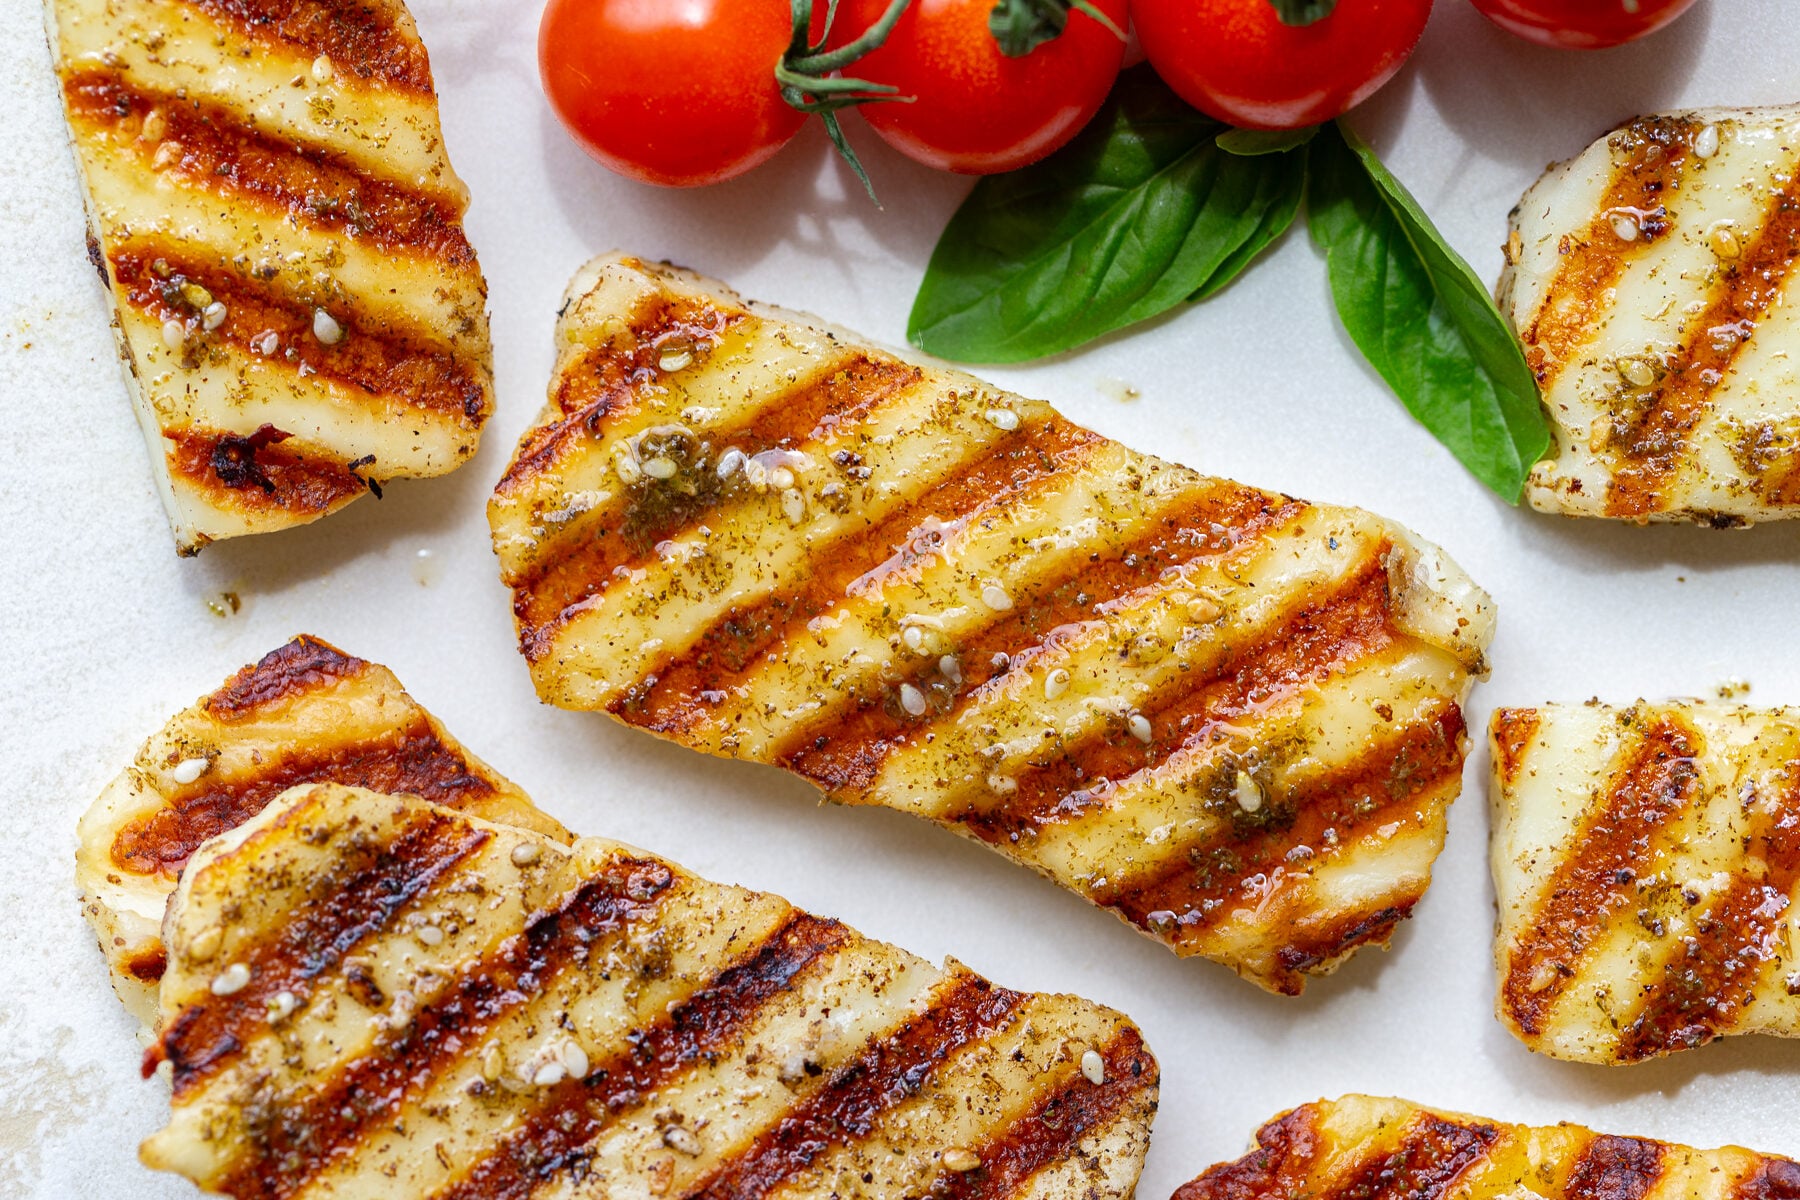
This grilled halloumi recipe is salty, squeaky, and gets a gorgeous golden crust on the grill without ever melting. Marinated in olive oil and zaatar, it’s ready in under 30 minutes and makes the easiest appetizer, salad topper, or side dish.
Ingredients
- 1 package halloumi about 8-9oz package
- 2 tablespoons extra virgin olive oil
- ½ tablespoon zaatar or Italian seasoning
- Canola oil spray if needed for grill
Instructions
- Slice Halloumi about ⅓ inch thick.
- Place the halloumi slices in a shallow dish and drizzle on the olive oil and sprinkle on the desired spices. Rub each piece to ensure the surface area is fully covered. Marinate at least 1 hour or even overnight.
- Pre-heat grill to about a medium-high heat (~400F). Alternatively, heat a grill pan over medium-high heat.
- Turn down the grill/ grill pan to medium and add on the halloumi slices placed on a diagonal for a nicer look. Grill for about 1-2 minute per side. We’re looking for some nice browning/lines and the Halloumi to be warm/hot.
- Remove from heat, sprinkle zaatar and serve.
Notes
Storage – Best served immediately while warm. Leftovers can be stored in an airtight container in the fridge for up to 3 days and reheated in a skillet.
Nutrition
Calories: 264kcal | Carbohydrates: 1g | Protein: 14g | Fat: 23g | Saturated Fat: 12g | Polyunsaturated Fat: 1g | Monounsaturated Fat: 9g | Sodium: 766mg | Potassium: 4mg | Fiber: 0.3g | Sugar: 0.3g | Vitamin A: 19IU | Vitamin C: 0.3mg | Calcium: 647mg | Iron: 1mg
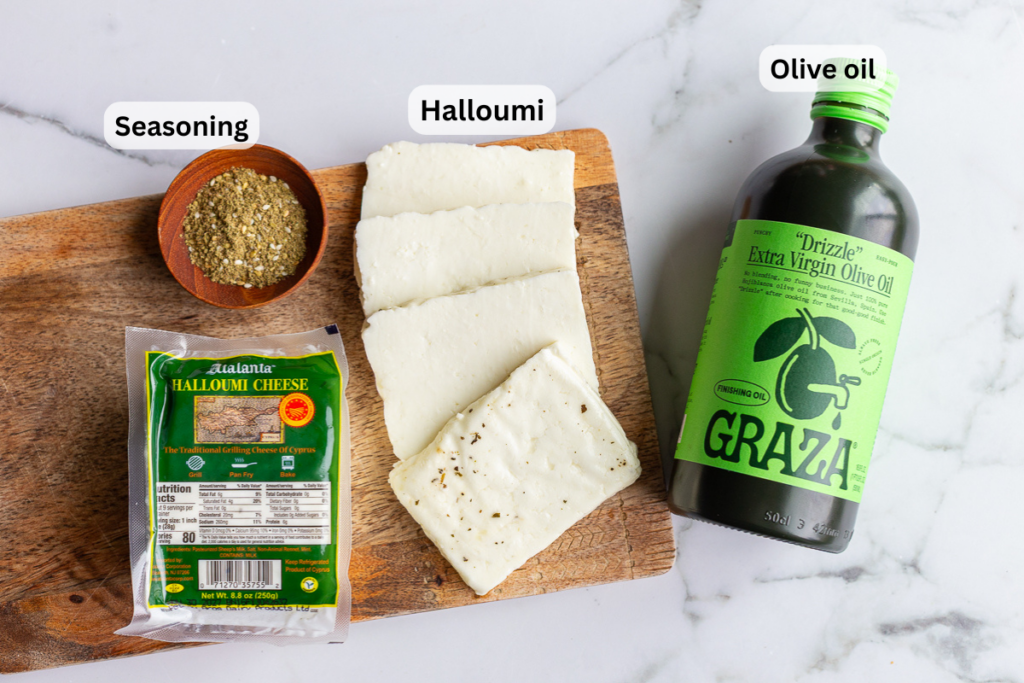
The Grilled Halloumi Cheese (So Easy!) is a Food with Feeling Recipe.
Sautéed Chestnut Mushrooms
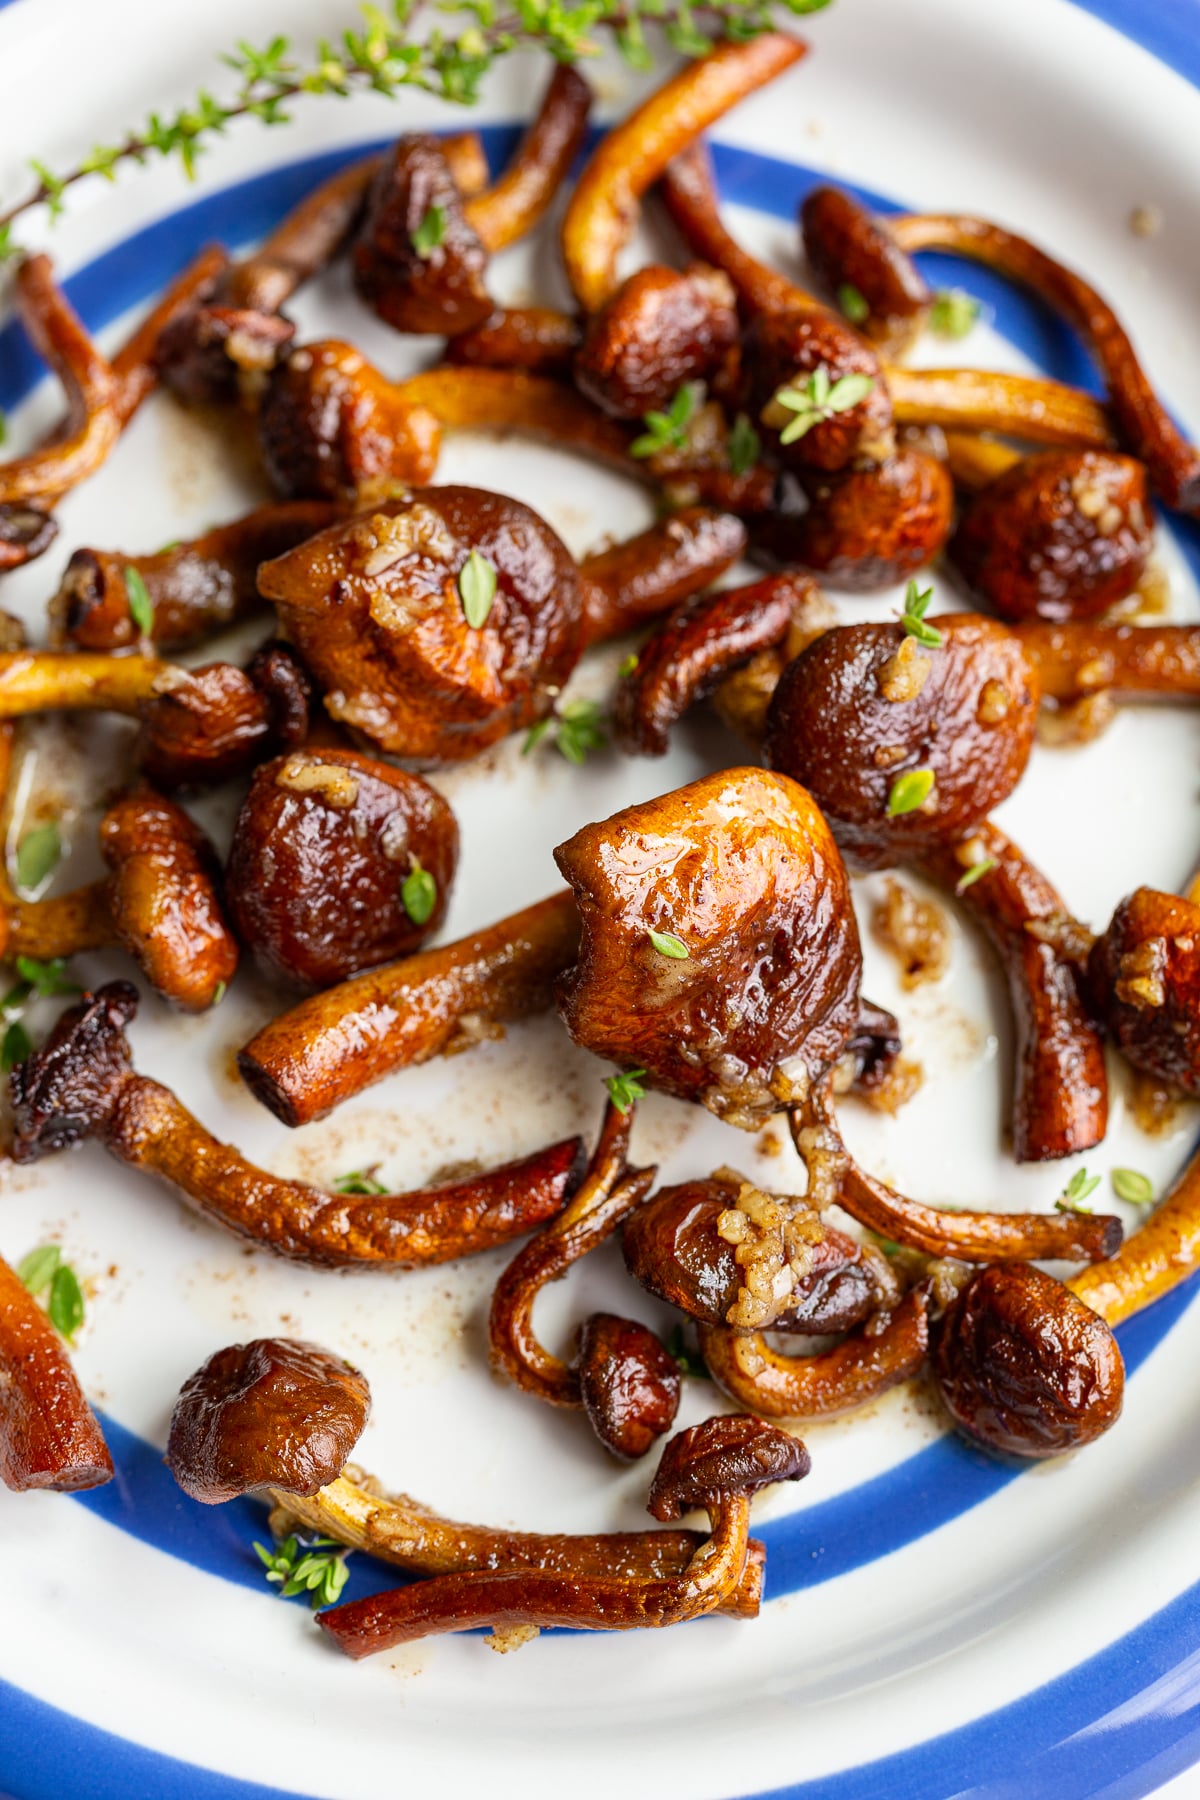
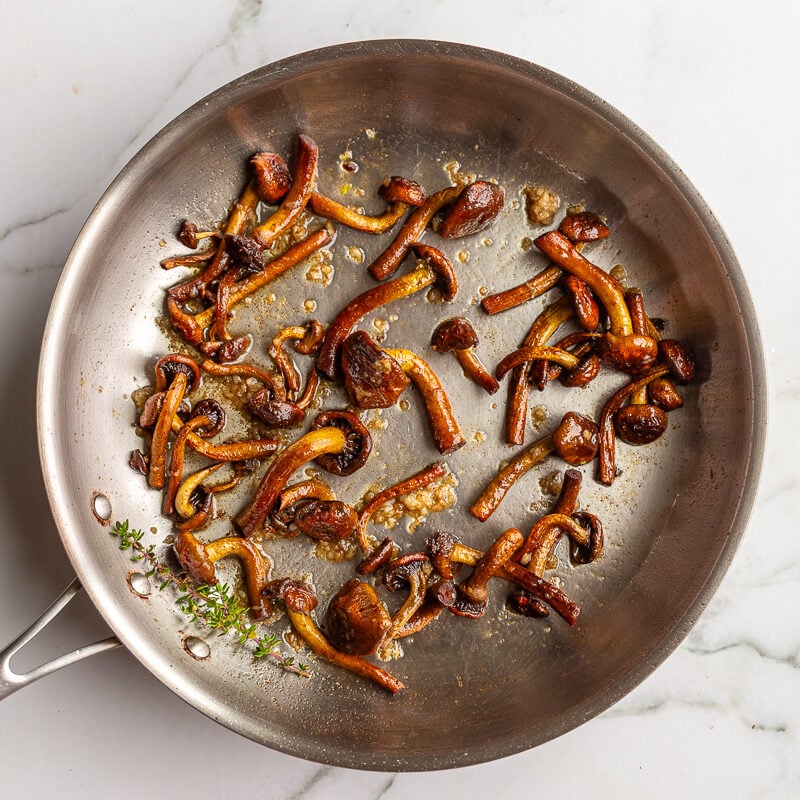
These Sautéed Chestnut Mushrooms have a nutty flavor and firm, meaty texture, cooked down in garlic butter with a splash of white wine and fresh thyme until deeply caramelized. Ready in just 15 minutes.
Ingredients
- 1 pound chestnut mushrooms trimmed
- 3 tablespoons butter
- 1 tablespoon olive oil
- Splash of white wine optional
- 2 cloves garlic minced
- A few sprigs fresh thyme
- Salt and pepper to taste
Instructions
- Trim off the tough base where the chestnut mushroom cluster was attached, then separate or slice the mushrooms as desired. Wipe clean with a damp cloth rather than rinsing.
- Heat the butter and olive oil in a large skillet over medium-high heat. Once hot, add the mushrooms in a single layer and let them cook undisturbed for 3-4 minutes to develop a deep golden crust.
- Stir and continue cooking for another 2-3 minutes, until the mushrooms are caramelized all over.
- Pour in the white wine, if using, and let it bubble and reduce for about a minute, scraping up any browned bits from the bottom of the pan.
- Stir in the garlic and fresh thyme and cook for 1 more minute, just until fragrant.
- Season with salt and pepper to taste and serve warm.
Notes
Storage: Store leftovers in an airtight container in the fridge for up to 4 days. Reheat in a skillet over medium heat.
Nutrition
Calories: 133kcal | Carbohydrates: 5g | Protein: 3g | Fat: 12g | Saturated Fat: 6g | Polyunsaturated Fat: 1g | Monounsaturated Fat: 5g | Trans Fat: 0.3g | Cholesterol: 23mg | Sodium: 75mg | Potassium: 517mg | Fiber: 1g | Sugar: 2g | Vitamin A: 263IU | Vitamin C: 0.5mg | Calcium: 26mg | Iron: 1mg
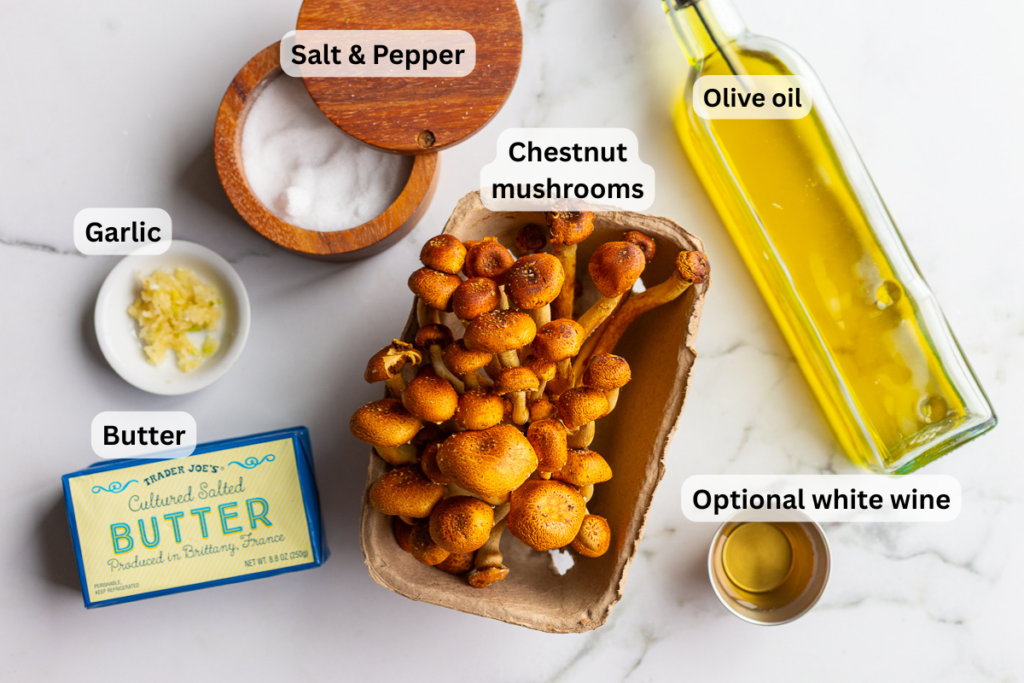
The Sautéed Chestnut Mushrooms is a Food with Feeling Recipe.
Lion’s Mane Steak (with Garlic Herb Butter)
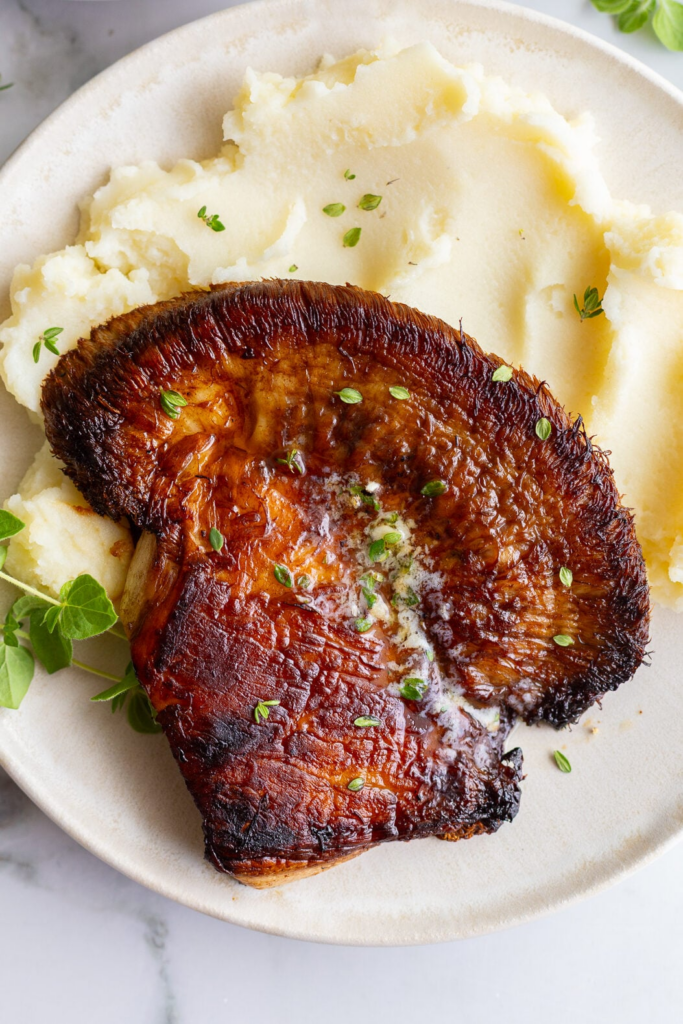
This Lion’s Mane Steak recipe develops a deep, golden-brown crust in a hot skillet and gets topped with a rich garlic herb butter. It’s a genuinely meaty vegetarian main that’s ready in just 25 minutes.
Ingredients
- 2 lion’s mane mushrooms* about 1 pound total
- 1 tablespoon olive oil
- 2 tablespoons butter divided
- 3 tablespoons soy sauce
- Salt and black pepper to taste
Garlic Herb Butter:
- ¼ cup butter softened
- 2 cloves garlic minced
- 1 teaspoon chopped fresh thyme
- 1 teaspoon chopped fresh rosemary
- 1 teaspoon chopped fresh parsley or oregano
Instructions
- Make the garlic herb butter: In a small bowl, combine the softened butter, garlic, thyme, rosemary, and parsley/oregano. Stir until fully combined and set aside.
To cook whole:
- Trim any dark or dry spots off the base of each mushroom, then gently brush off any dirt with a dry paper towel or soft brush (avoid rinsing with water – lion’s mane soaks it up like a sponge).
- Heat the olive oil and 1 tablespoon of butter in a large skillet over medium heat. Once melted and sizzling, add the whole mushrooms. Press down gently with a spatula (or set a smaller pan/lid on top to weigh them down) to help them make full contact with the skillet. Sear for 4-5 minutes until deeply golden on the first side.
- Flip the mushrooms, then immediately drizzle the soy sauce over the top and around the pan. Let it sizzle and caramelize for another 4-5 minutes, spooning any pan juices back over the mushrooms as they cook. Season with salt and pepper.
To cook sliced into rounds:
- Trim the base and slice the mushroom crosswise into 1-inch thick rounds.
- Heat the olive oil and 1 tablespoon of butter in a large skillet over medium-high heat. Add the mushroom rounds in a single layer, without overcrowding. Sear for 3-4 minutes until golden on the first side.
- Flip the rounds, then drizzle the soy sauce over the top and around the pan. Cook for another 3-4 minutes, spooning the pan juices back over the top as they caramelize. Season with pepper (go easy on the salt – the soy sauce brings plenty).
- Remove the skillet from the heat and immediately top the hot mushrooms with the garlic herb butter, letting it melt over them. Spoon any melted butter from the pan back over the top before serving.
Notes
- Add the soy sauce after the flip, not at the start – this is what gives you that deep, glossy color without steaming the mushrooms.
- Go easy on added salt; the soy sauce brings enough seasoning on its own.
- Lion’s mane releases quite a bit of water as it cooks – let it evaporate before the mushroom starts to brown, this is what gives you that deep golden crust instead of a steamed texture.
- Leftovers keep in an airtight container in the fridge for up to 3 days. Reheat in a skillet over medium heat to bring back the crust.
Mushroom Size – Whole mushrooms make for a more dramatic, steakhouse-style presentation; sliced rounds cook a bit faster and are easier to portion. If you’re getting whole mushrooms, I suggest finding 2-4 medium sized mushrooms. If you’re cutting them into rounds, I’d aim to get 1 large mushroom (about the size of an adult head – seriously lol)
Nutrition
Calories: 193kcal | Carbohydrates: 1g | Protein: 2g | Fat: 21g | Saturated Fat: 11g | Polyunsaturated Fat: 1g | Monounsaturated Fat: 7g | Trans Fat: 1g | Cholesterol: 46mg | Sodium: 891mg | Potassium: 41mg | Fiber: 0.1g | Sugar: 0.3g | Vitamin A: 530IU | Vitamin C: 0.5mg | Calcium: 11mg | Iron: 0.4mg
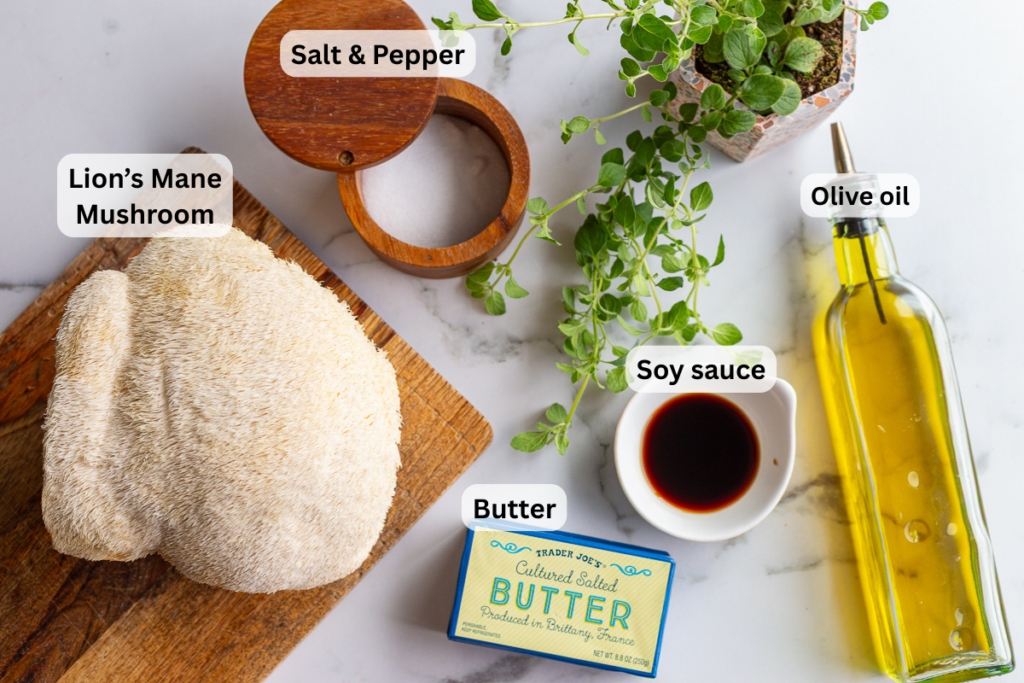
The Lion’s Mane Steak (with Garlic Herb Butter) is a Food with Feeling Recipe.
Macerated Strawberries
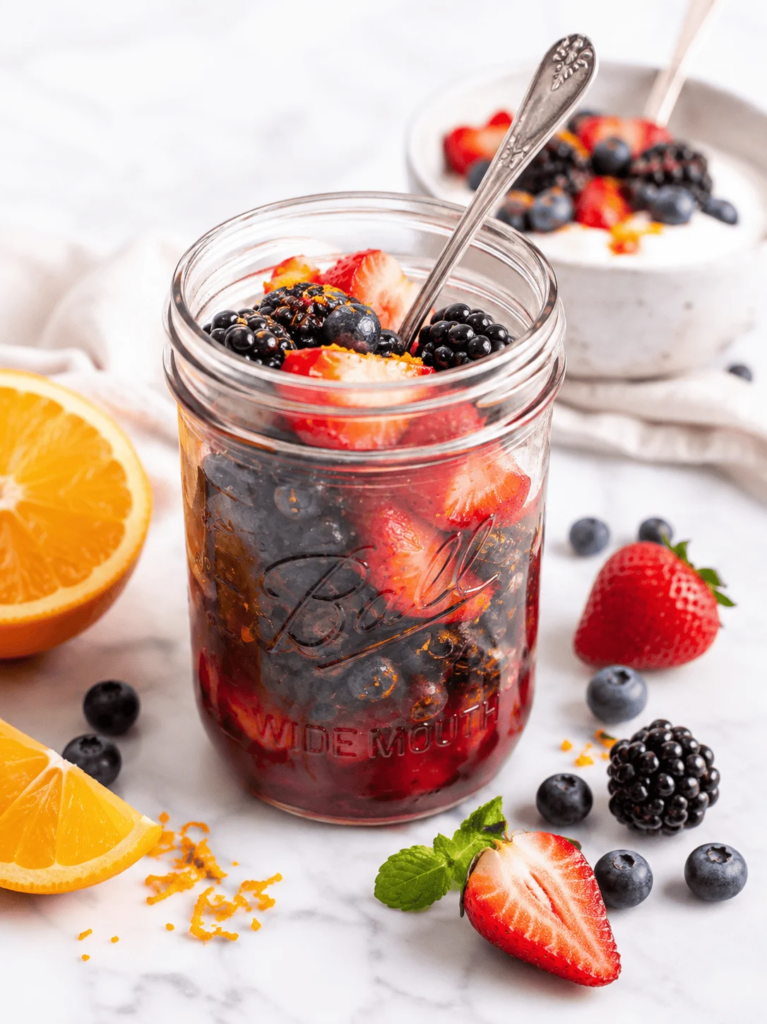
Ingredients
- ▢2 cups sliced strawberries
- ▢1 cup blueberries
- ▢1/4 cup orange juice (one squeezed orange)
- ▢1 teaspoon orange zest
- ▢2 tablespoons maple syrup (or agave nectar)
- ▢1 teaspoon vanilla extract
Instructions
- Wash the fruit. Rinse the strawberries and blueberries in a colander under cool running water. Wash the orange as well, since you’ll be using the zest.
- Remove the stems and slice the strawberries into bite-sized pieces.
- Finely grate the orange zest until you have about 1 teaspoon. Then cut the orange in half and squeeze the juice into a small bowl or measuring cup (about ¼ cup). A citrus juicer will help remove the seeds.
- Place the sliced strawberries and blueberries in a quart-sized mason jar or other airtight container. Pour the orange juice, maple syrup, vanilla extract, and orange zest over the berries.
- Mix gently. Secure the lid and gently shake the jar until the berries are evenly coated with the juices. Avoid shaking too vigorously, as you want the berries to hold their shape.
- Let the berries macerate. Refrigerate for at least 1 hour to allow the berries to soften slightly and release their natural juices.
- Spoon the macerated berries and their delicious juices over waffles, pancakes, oatmeal, yogurt, nice cream, or your favorite dessert.
Notes
Helpful Tip: Step-by-step photos are included above to guide you through the recipe and make it easy to follow. There are also FAQs, variations, and serving suggestions.
Why Would You Macerate Berries?
Macerating berries is a simple technique that brings out their natural sweetness and creates a delicious, syrupy sauce without cooking. As the berries rest with maple syrup and fresh orange juice, they release their juices, soften slightly, and become even more flavorful. The result is a vibrant fruit topping that’s perfect for breakfast, snacks, and desserts.
This recipe uses strawberries and blueberries, but the same method works beautifully with raspberries, blackberries, peaches, and other fresh fruit. After just an hour in the refrigerator, you’ll have juicy, flavor-packed berries that can elevate everything from healthy oatmeal bowls and pancakes to waffles, dairy-free yogurt, and nice cream.
Storage Instructions
Store leftover macerated berries in an airtight container or mason jar in the refrigerator for up to 4 days. As they sit, the berries will continue to soften and release more of their natural juices, making them even more delicious for spooning over oatmeal, pancakes, waffles, yogurt, or nice cream.
Give the berries a gentle stir before serving to redistribute the flavorful juices. While they can be frozen for up to 3 months, the berries will become much softer after thawing. Frozen and thawed macerated berries are best enjoyed as a topping for oatmeal, smoothies, yogurt, or desserts rather than served fresh on their own.
Nutrition
Serving: 0.5cup | Calories: 54kcal | Carbohydrates: 13g | Protein: 1g | Fat: 0.2g | Sodium: 1mg | Fiber: 2g | Sugar: 10g
The Macerated Strawberries is a Sarai Leo Matsui Recipe at Eat Plant Based