

Easy Sautéed Cinnamon Apples
Apple Pie Flavor · One Pan · 13 Minutes
Breakfast, dessert, or honestly just a spoon. No judgment.
|
5 min
Prep
|
8 min
Cook
|
13 min
Total
|
181
Cal / serving
|
2
Servings
|
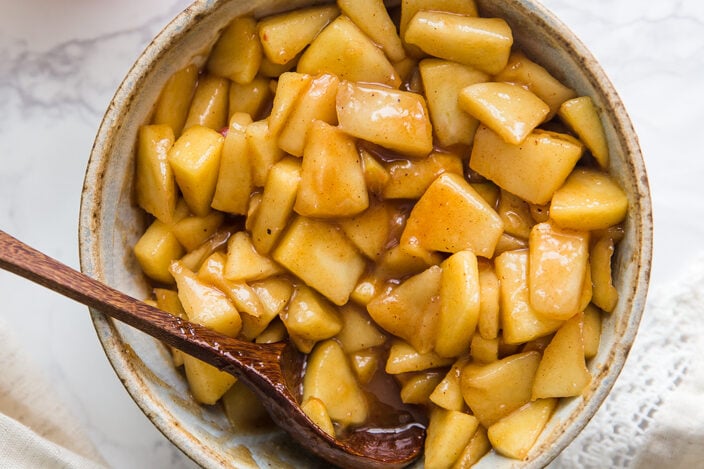
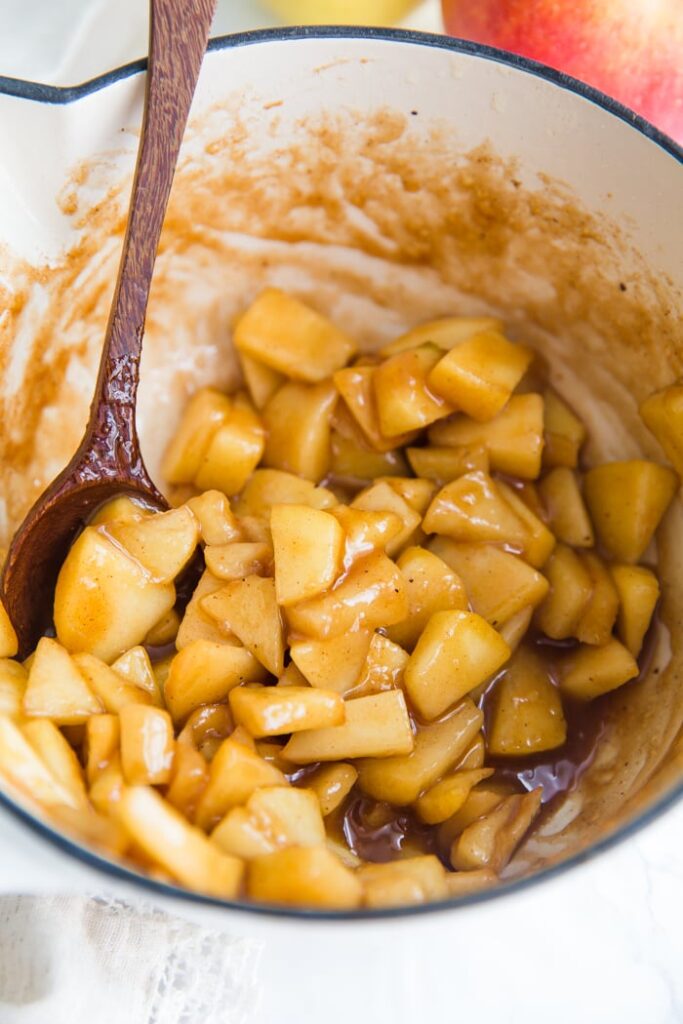
These sautéed cinnamon apples taste exactly like apple pie filling, minus the crust and the ninety minutes it takes to make one. They come together in a single pan in under fifteen minutes, they use ingredients you almost certainly already have, and they work for breakfast, dessert, or as a topping for about a dozen different things you probably already make. The cornstarch slurry is the detail that makes this recipe genuinely great rather than just fine: it creates that glossy, silky sauce that apple pie filling has, and without it you just have cooked apples in juice, which is a different and lesser thing.
The apple choice matters more than you might expect. You want a variety that holds its shape under heat rather than collapsing into mush, so reach for Honeycrisp, Pink Lady, Braeburn, Jazz, Fuji, or Granny Smith. Avoid Red Delicious, Gala, and McIntosh, which have softer flesh that breaks down too quickly in the pan and gives you something closer to applesauce than to the tender, distinct pieces this recipe is going for.
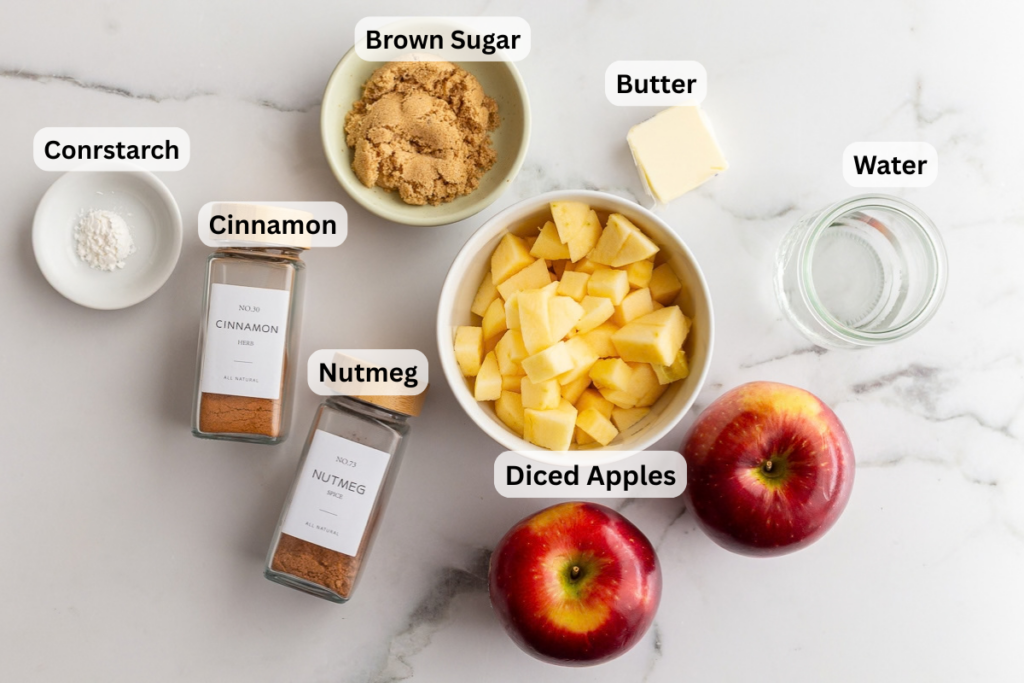
Ingredients
| Ingredient | Amount | Notes |
| 🧈 Butter or coconut oil | 1½ tablespoons | Coconut oil keeps it dairy-free. |
| 🍎 Apple | 1 large | Peeled, cored, chopped. Honeycrisp or Pink Lady recommended. |
| 🍂 Brown sugar | 2 tablespoons | Coconut sugar or monk fruit for refined sugar-free. |
| 🤎 Ground cinnamon | ¼ teaspoon | Add more to taste. |
| 🌰 Ground nutmeg | Pinch | Just a pinch. It’s potent. |
| 🥛 Cornstarch + water | ½ tsp + 2 tbsp | Mixed into a slurry. This is what makes the sauce silky. |
Instructions
Cook the apples
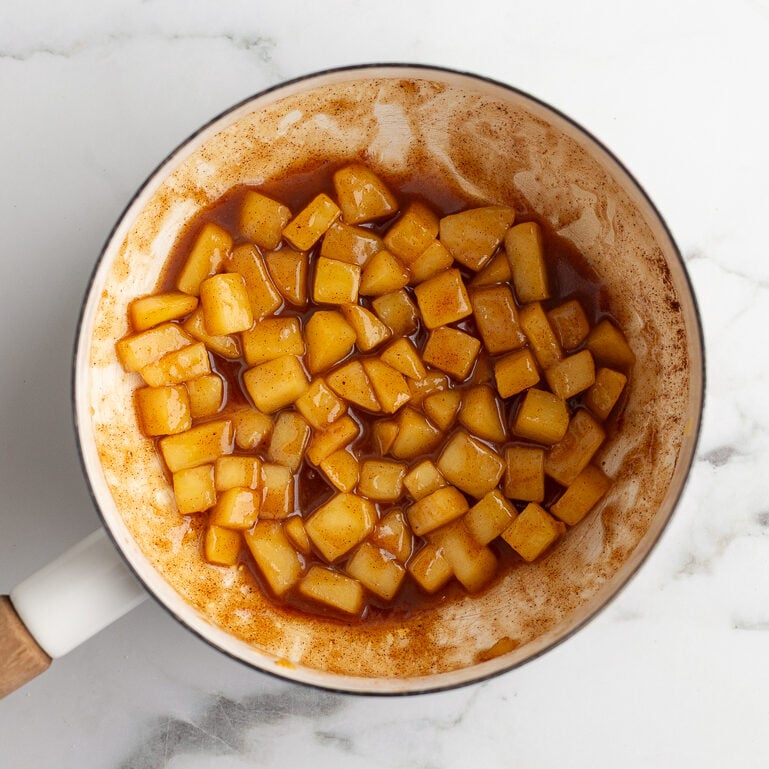
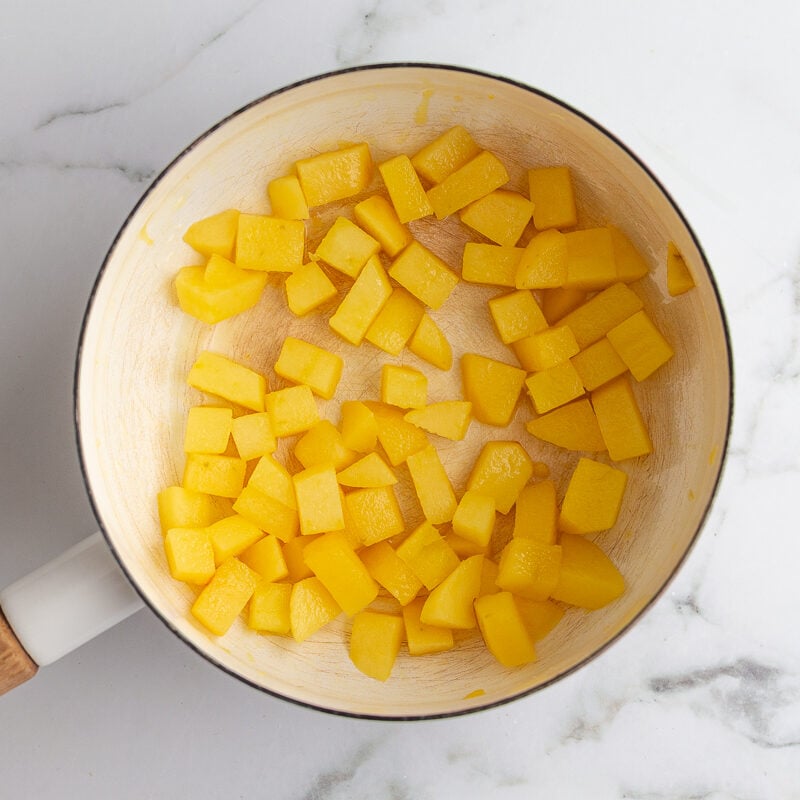
Melt the butter in a medium saucepan over medium heat. Once fully melted, add the apples and stir to coat them in the butter. Sauté for 7 to 10 minutes until tender to your liking. Cook time will vary depending on how thickly you’ve sliced or chopped them.
Make the slurry
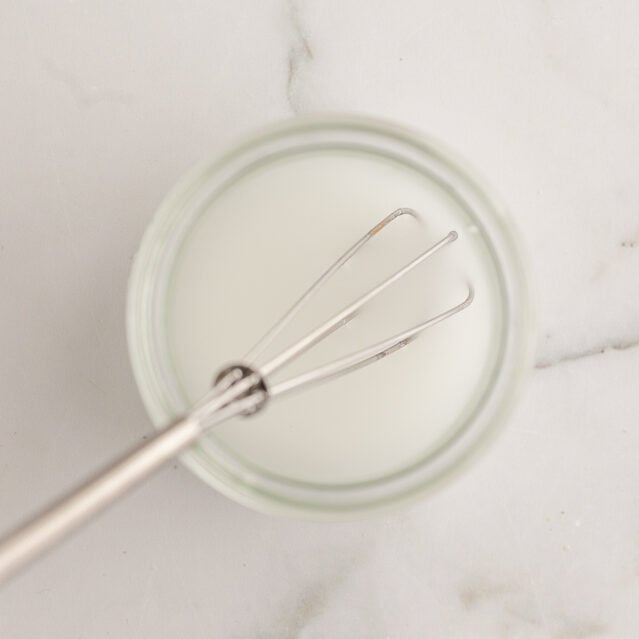
While the apples cook, stir together the cornstarch and water in a small bowl until fully combined. Set aside. This takes about ten seconds and is the step that transforms the sauce from watery to glossy and thick.
Add the sugar, spices, and slurry
Once the apples are tender, remove the pan from the heat and immediately stir in the cornstarch slurry. Once combined, stir in the brown sugar, cinnamon, and nutmeg. The residual heat will thicken the sauce quickly.
Serve
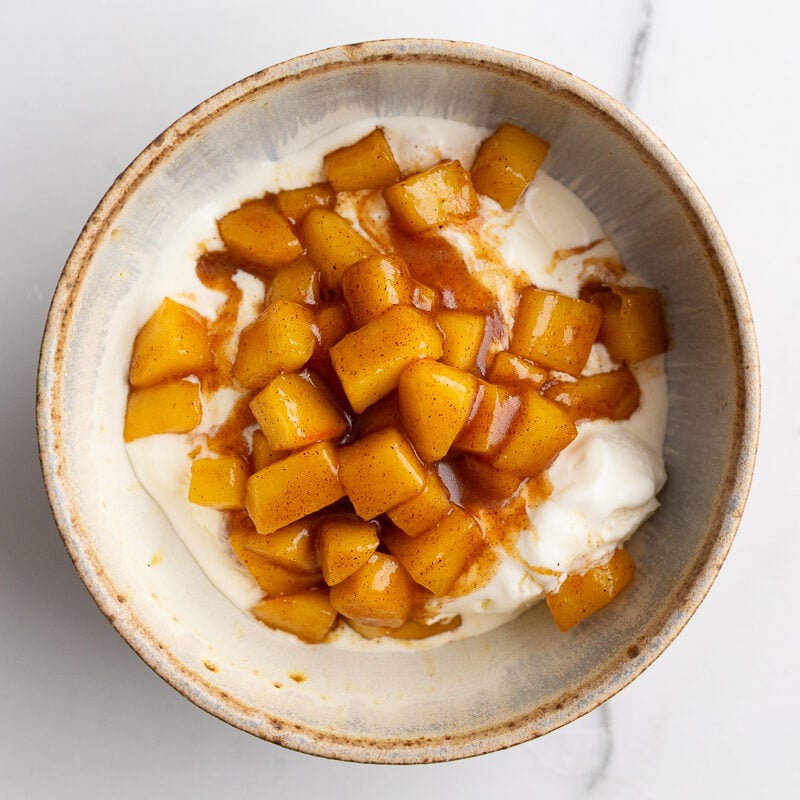
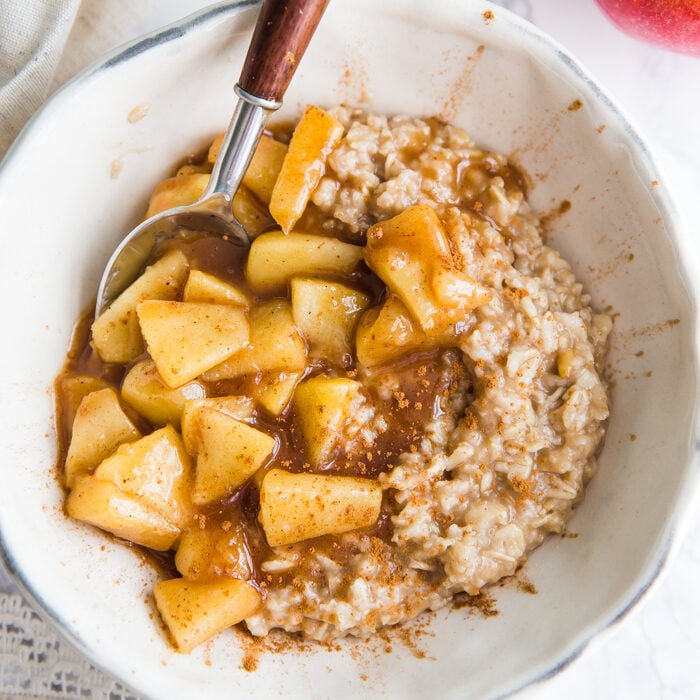
Enjoy immediately over oatmeal, pancakes, waffles, French toast, yogurt, or vanilla ice cream. Or eat them directly from the pan with a spoon. No judgment on that last one.
Ways to Serve Sautéed Cinnamon Apples
| 🥣 | Over oatmeal — the most natural fit. The apples and their sauce sink into the oats and make the whole bowl taste like dessert. |
| 🧇 | Pancakes or waffles — spoon them over the top instead of syrup for an autumn breakfast that is genuinely special. |
| 🍦 | Vanilla ice cream — the warm apples against cold ice cream is one of the better combinations in dessert. |
| 🥐 | Puff pastry or crescent rolls — use as apple pie filling without building a crust. |
| 🥩 | Pork tenderloin or pork chops — a savory application that works remarkably well with the cinnamon and brown sugar notes. |
Tips Worth Knowing
Peeling is optional but recommended. The skin stays a bit chewy after cooking and changes the texture from silky to slightly rustic. If you want something closer to classic apple pie filling, peel the apple first.
Don’t skip the cornstarch. You can simmer longer to reduce the liquid naturally, but the slurry gives you that glossy, thick sauce in seconds without overcooking the apples.
This recipe doubles and triples easily. It’s sized for two oatmeal bowls by design, but scale it up for meal prep and store in the fridge for up to 3 to 4 days.
Nutrition Per Serving
| Calories | Carbs | Fat | Fiber | Sugar | Sodium |
| 181 kcal | 28g | 9g | 3g | 23g | 72mg |
More plant-forward recipes and sustainable food ideas on the SAN Recipes page.
More SAN Recipes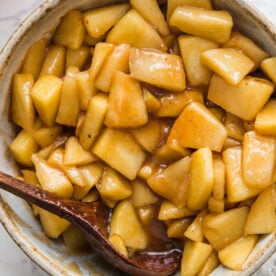
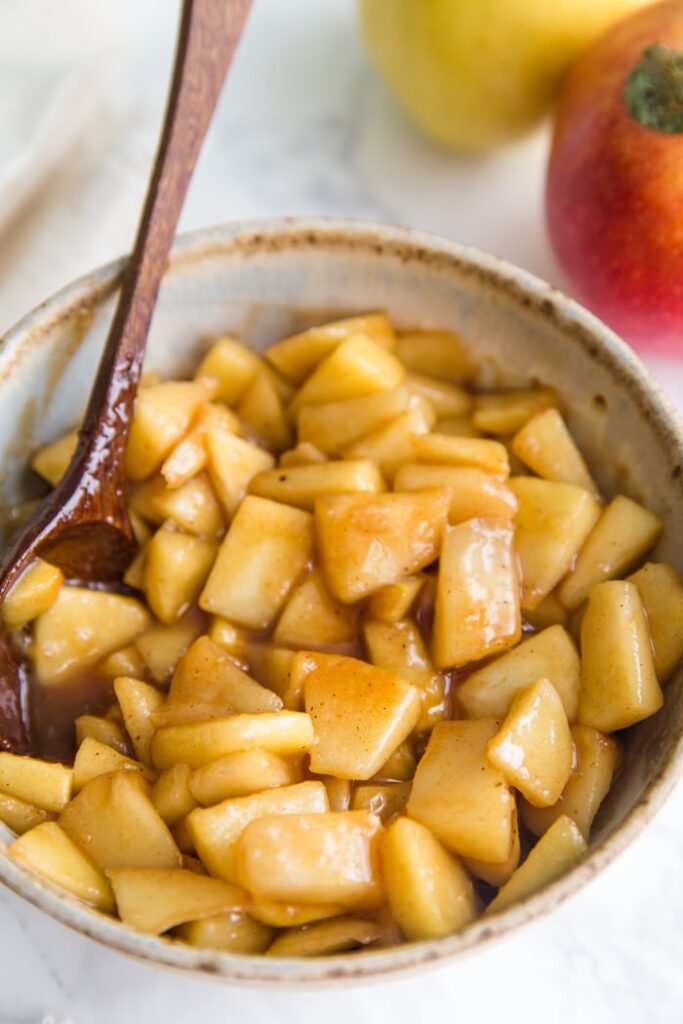
The Sautéed Cinnamon Apples is a Food with Feeling Recipe.
Air Fryer Asparagus
Crispy Tips · Garlic and Parmesan · 12 Minutes
The side dish that converts people who claim they don’t like asparagus.
|
5 min
Prep
|
7 min
Cook
|
12 min
Total
|
33
Cal / serving (no cheese)
|
4
Servings
|
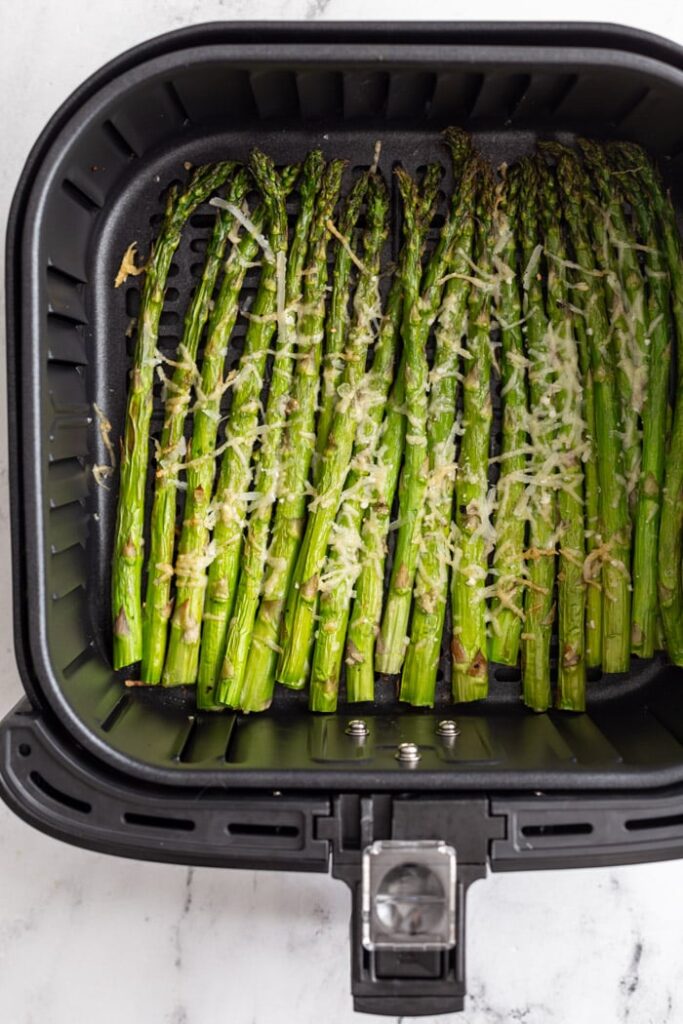
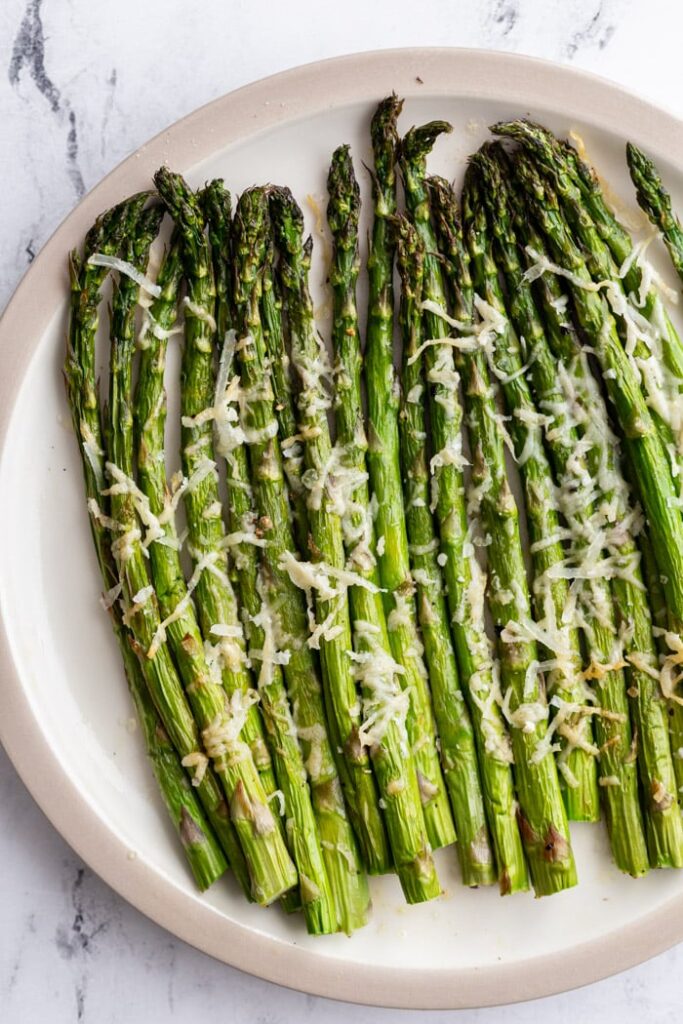
The air fryer does something to asparagus that other cooking methods don’t quite replicate: it gets the tips genuinely crispy while keeping the stalks tender, and it does it in seven minutes without heating up the whole kitchen or requiring you to babysit a skillet. Add garlic powder, a good hit of salt, and some parmesan over the top partway through cooking, and you have a side dish that is harder to walk past without eating directly off the tray than it has any right to be.
Asparagus has an earthy flavor similar to broccoli, and one of its best qualities is its ability to absorb other flavors readily. The garlic and olive oil here do most of the work. The parmesan finishes it. The lemon juice you squeeze over the top at the end is optional but highly recommended because it cuts through the richness and makes the whole thing taste brighter and more alive. This works as a simple side dish, but it is also excellent added to pasta, tossed into a salad, or layered into a flatbread.
Ingredients
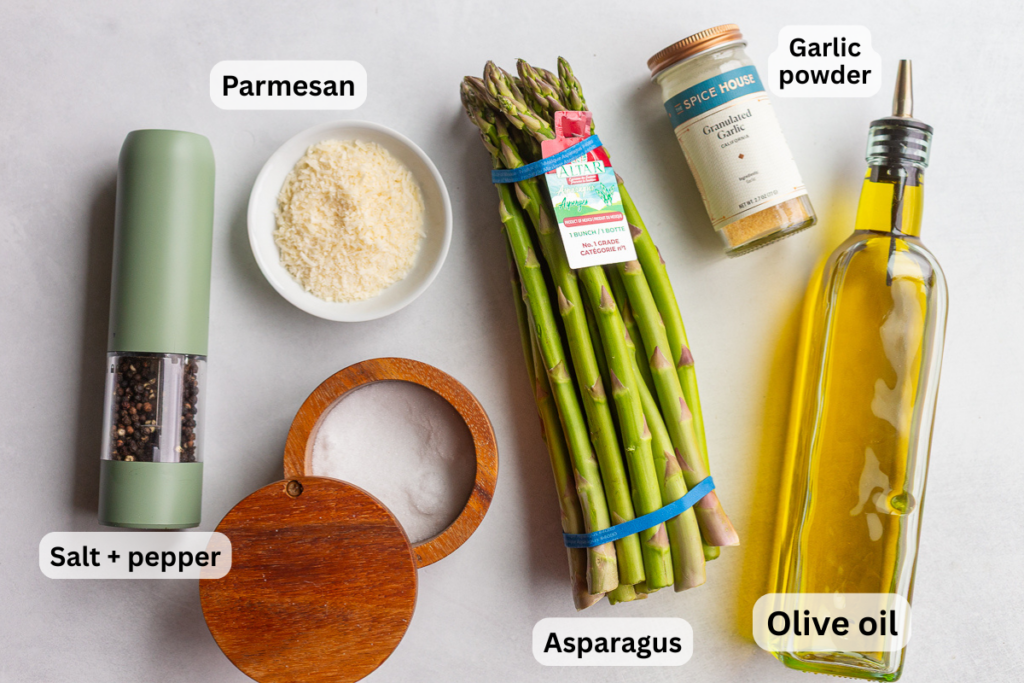
| Ingredient | Amount | Notes |
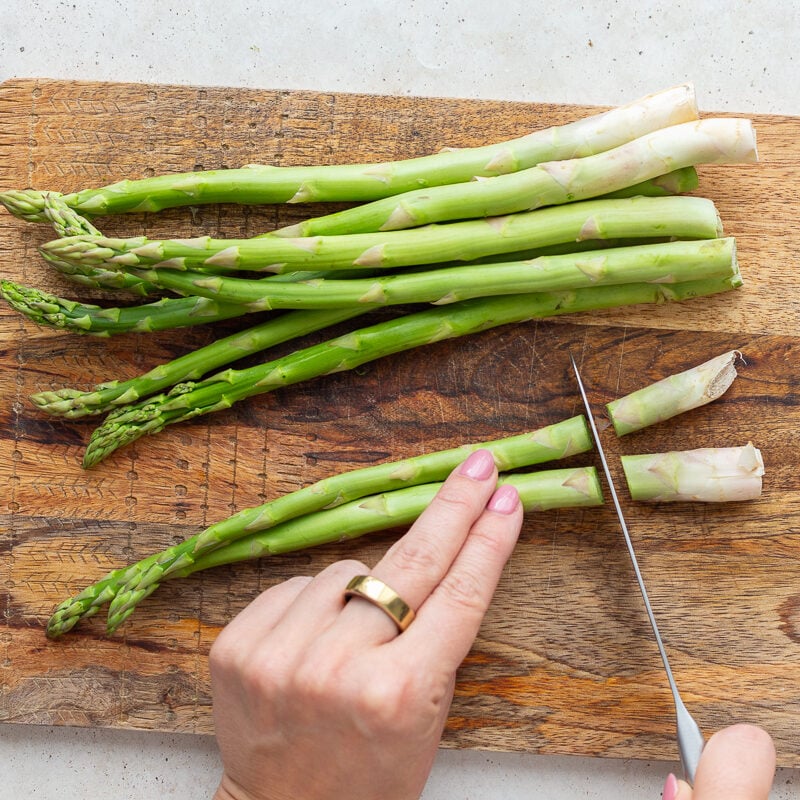
| 🌿 Asparagus | 1 bunch | Hard woody ends trimmed off. About 1 to 2 inches from the bottom. |
| 🫒 Olive oil | 1 tablespoon | Melted ghee or butter also works well. |
| 🧄 Garlic powder | ½ teaspoon | Italian seasoning, rosemary, or thyme also work well. |
| 🧂 Salt and pepper | To taste | Season generously. Asparagus can handle it. |
| 🧀 Parmesan (optional) | ¼ cup | Skip for vegan or use Violife vegan parmesan. Feta is also excellent. |
Instructions
Preheat the air fryer
Preheat your air fryer to 400°F for 5 minutes. Not all air fryer models have a preheat function; if yours doesn’t, simply let it run empty for a few minutes before adding the asparagus. Preheating helps ensure even cooking and crispier tips.
Prep and season the asparagus
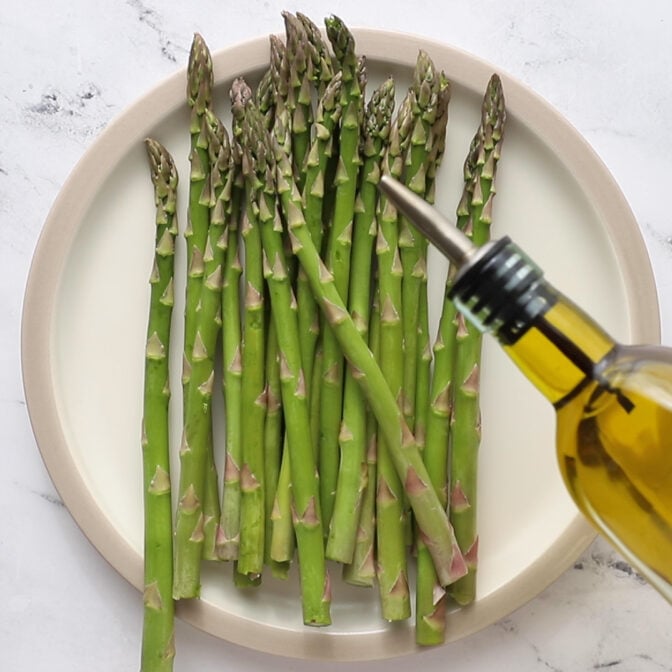
Trim the hard woody ends off the asparagus, about 1 to 2 inches from the bottom. You can snap them off where they naturally break or cut them with a knife. Drizzle with olive oil and sprinkle on the garlic powder, salt, and pepper. Toss gently to coat.
Air fry and add parmesan
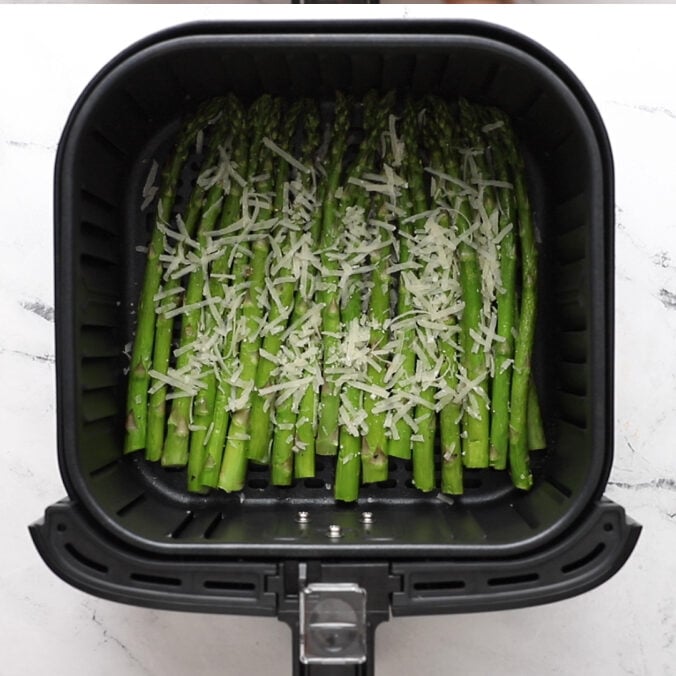
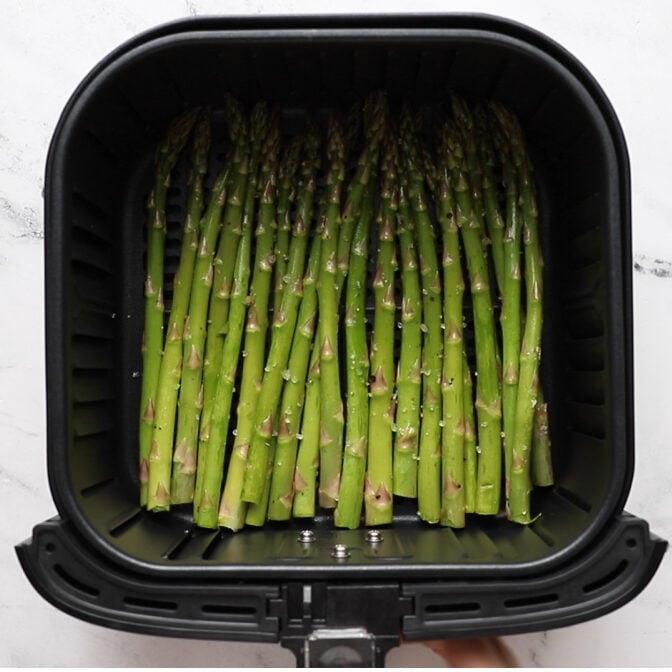
Lay the asparagus flat in the air fryer basket in a single layer. A few pieces overlapping slightly is fine, but do not stack them or they will steam rather than crisp. Air fry for 5 minutes, then sprinkle the parmesan over the top and air fry for 2 to 4 more minutes depending on thickness.
Serve
Sprinkle with additional parmesan, a squeeze of fresh lemon juice, and fresh cracked black pepper. Serve immediately while the tips are still crispy.
Tips for the Best Air Fryer Asparagus
| • | Line the basket with parchment paper. It prevents sticking and makes cleanup genuinely easy. |
| • | Don’t overcrowd the basket. Cook in batches if needed. Overcrowding creates steam and gives you soft, limp asparagus instead of the crispy result this recipe is going for. |
| • | Adjust for thickness. Very thin asparagus may only need 2 more minutes after the parmesan goes on. Thick stalks may need the full 4 additional minutes. |
| • | For extra crunch, dust lightly with panko breadcrumbs before air frying and use a little less oil to prevent steaming. |
Storage
Store cooked asparagus in an airtight container in the refrigerator for up to 4 days. To keep fresh raw asparagus at its best before cooking, store it upright in a jar with a few inches of water in the refrigerator, stem side down, like flowers in a vase.
Nutrition Per Serving (without cheese)
| Calories | Carbs | Fat | Fiber | Protein | Sodium |
| 33 kcal | 0.4g | 4g | 0.1g | 0.1g | 0.4mg |
More plant-forward recipes and sustainable food ideas on the SAN Recipes page.
More SAN Recipes
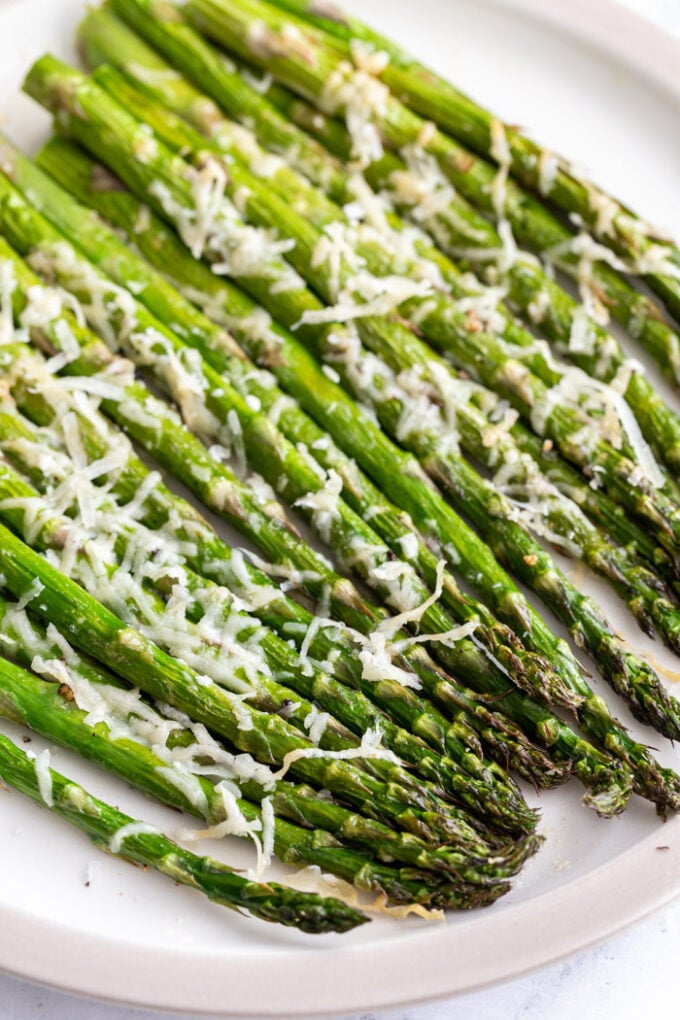
The Air Fryer Asparagus is a Food with Feeling Recipe.
Vegan Turkey Roast
With Crispy Skin · Seitan-Based · Stunning Centerpiece
The plant-based main that looks like it took all day and actually takes 65 minutes. Perfect for Thanksgiving, Christmas, or any occasion that deserves a centerpiece.
|
15 min
Prep
|
50 min
Cook
|
65 min
Total
|
181
Cal / serving
|
28g
Protein / serving
|
6
Servings
|
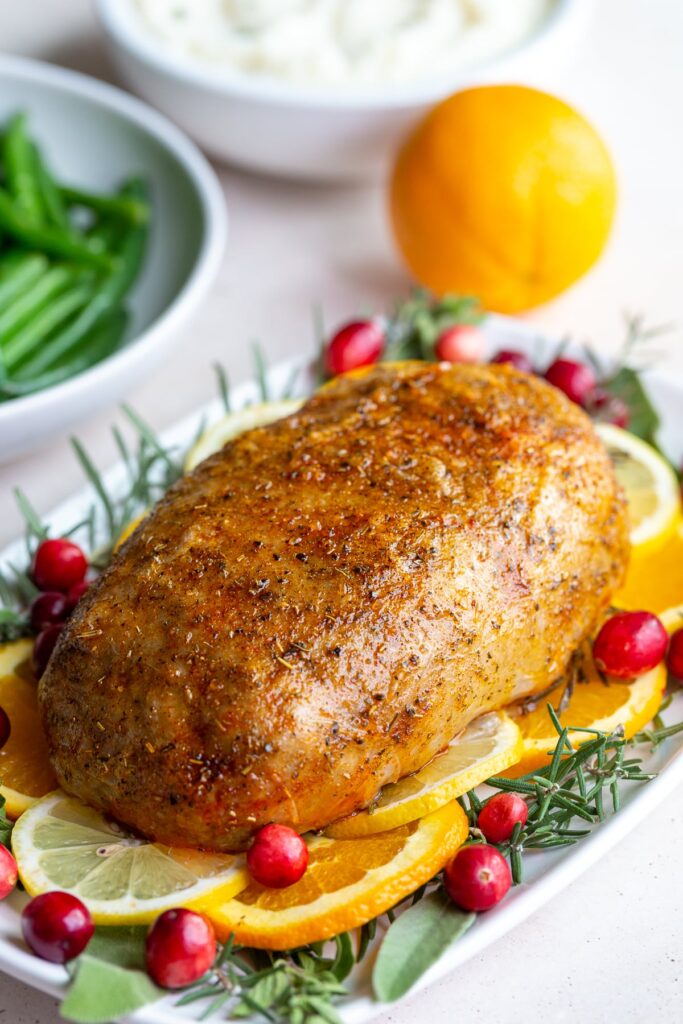
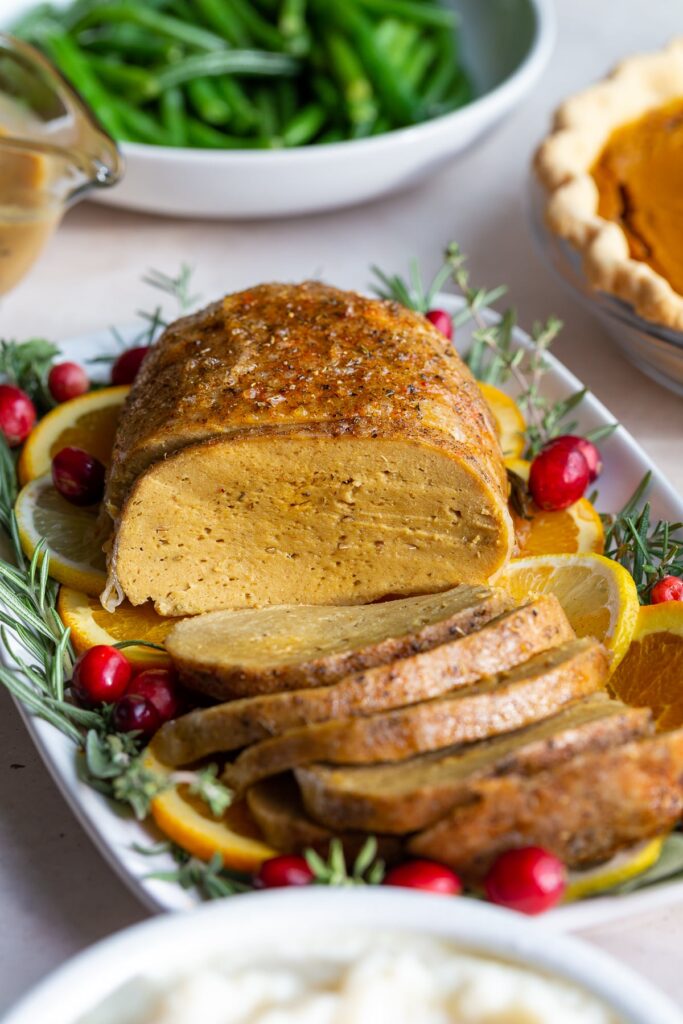
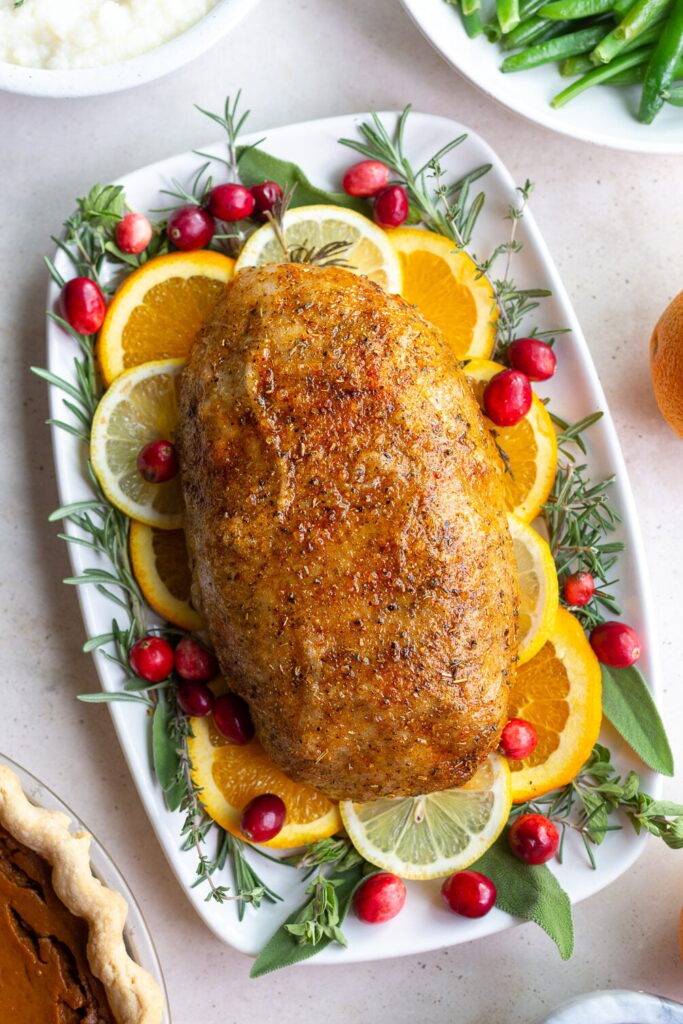
This is the recipe that makes vegan holiday cooking feel genuinely possible for people who are nervous about it. The vegan turkey roast is built on a seitan base made from vital wheat gluten and silken tofu, steamed first to develop its structure and then wrapped in rice paper that goes golden and crispy in the oven, giving you a roast with an actual crust that slices cleanly and looks stunning on a holiday table. It is easier to make than the ingredient list suggests, it delivers 28 grams of protein per serving, and it brings the visual drama that a holiday centerpiece is supposed to have without requiring anything from an animal.
The rice paper wrapping technique is the key detail that separates this recipe from other vegan roasts: when brushed with olive oil and roasted at high heat, rice paper sheets form a genuinely crispy skin that browns the way actual roasted meat skin does. The fennel seeds in the seitan mixture are optional but strongly recommended because they add a subtle savory depth that makes the finished roast taste more complex and complete. Fresh rosemary sprigs and thin citrus slices arranged in the roasting pan underneath the loaf are entirely optional but take the presentation from good to remarkable.
Ingredients
For the Seitan Loaf
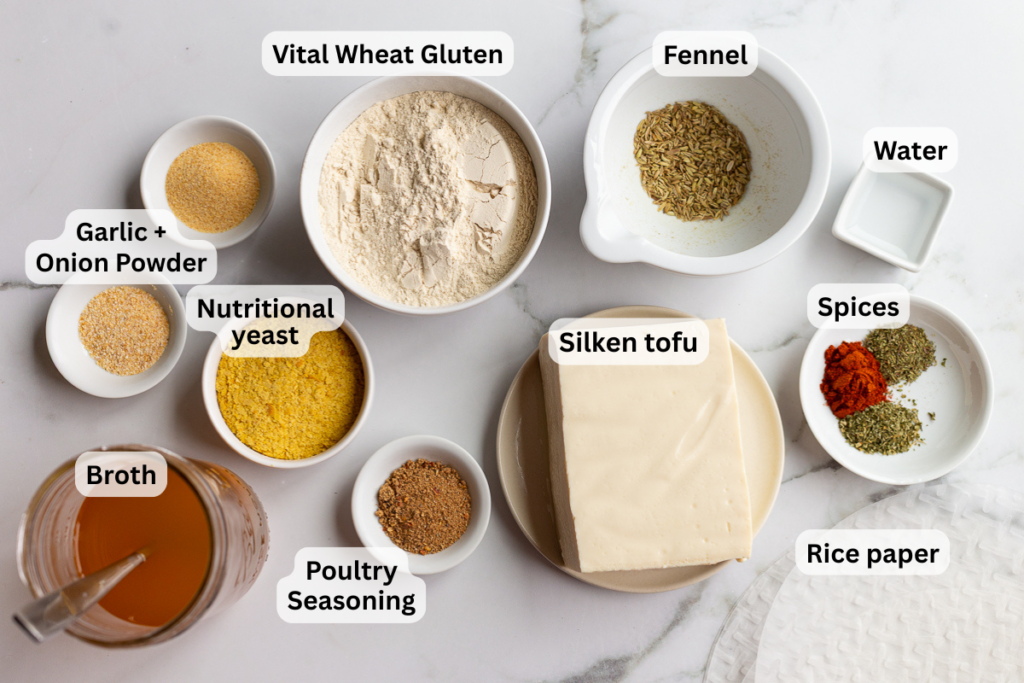
| Ingredient | Amount | Notes |
| Vital wheat gluten | 1½ cups | The structural base of the seitan. Found at most health food stores or online. |
| Silken tofu | 14 oz block | Processed until completely smooth. Silken texture is important here. |
| Water | 1 tablespoon | Added to the tofu before processing. |
| Poultry seasoning or Adobo | 2 teaspoons | Both work well. Poultry seasoning is the more traditional choice. |
| Nutritional yeast | ⅓ cup | Adds savory depth and a slight umami quality. |
| Garlic powder | 2 teaspoons | |
| Onion powder | 1 teaspoon | |
| Salt | 1 teaspoon | |
| Crushed fennel seeds | 2 teaspoons | Optional but highly recommended. Adds real savory complexity. |
| Veggie broth | 1 to 2 cups | For steaming. Adds flavor during the first cook stage. |
| Rice paper sheets | 3 sheets | Creates the crispy skin when roasted. Standard spring roll rice paper. |
For the Herb Rub and Roasting
| Ingredient | Amount | Notes |
| Dried thyme | ½ teaspoon | Applied to the outside of the rice paper wrap before roasting. |
| Dried parsley | ½ teaspoon | |
| Paprika | 1 teaspoon | Adds color to the crust. Don’t skip it. |
| Sea salt and black pepper | Good pinch of each | Season generously over the outside. |
| Olive oil | For brushing | Brushed all over before roasting. Essential for the crispy skin. |
| Fresh rosemary + citrus slices | Optional | Arranged in the roasting pan. Makes for a beautiful presentation. |
Instructions
Make the seitan mixture in a food processor
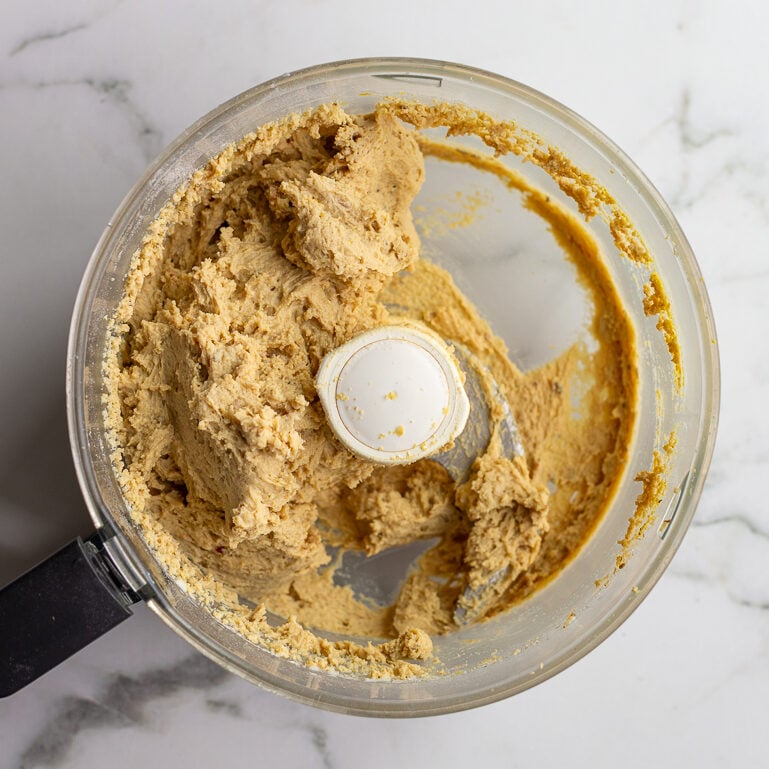
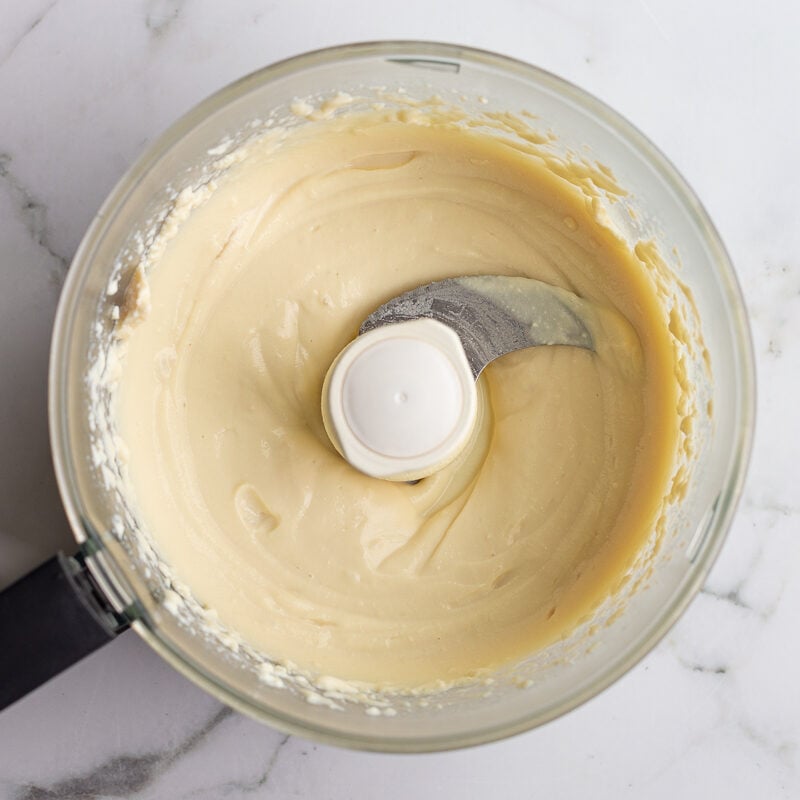
Add the silken tofu and water to a food processor and process until completely smooth with no lumps remaining. Add the vital wheat gluten, poultry seasoning, nutritional yeast, garlic powder, onion powder, salt, and fennel seeds. Blend until the mixture comes completely together and forms a tight ball inside the processor bowl. Keep blending until it is fully cohesive. This usually takes 2 to 3 minutes.
Shape and steam the loaf
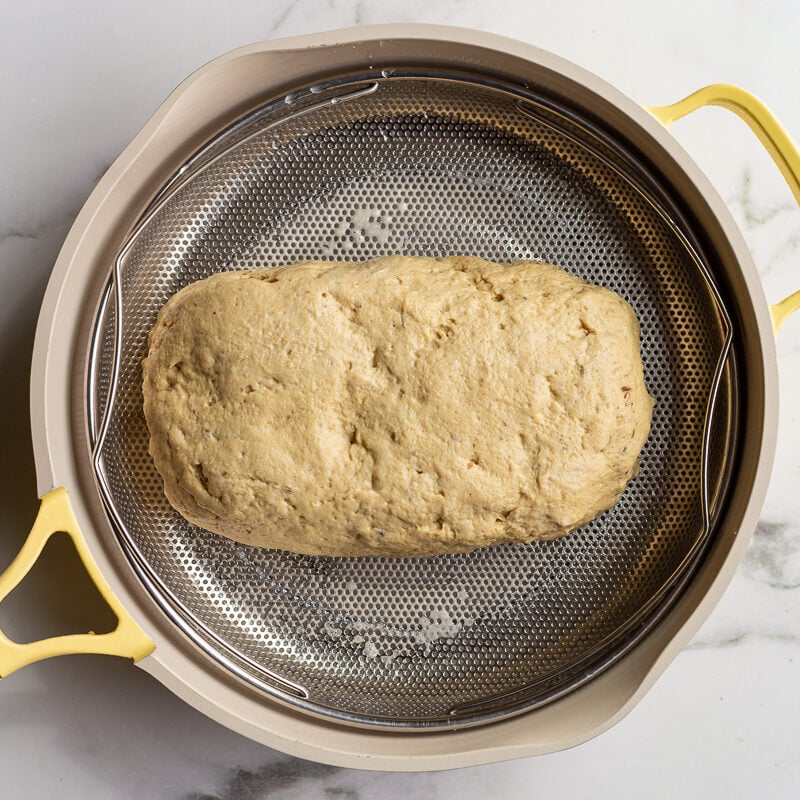
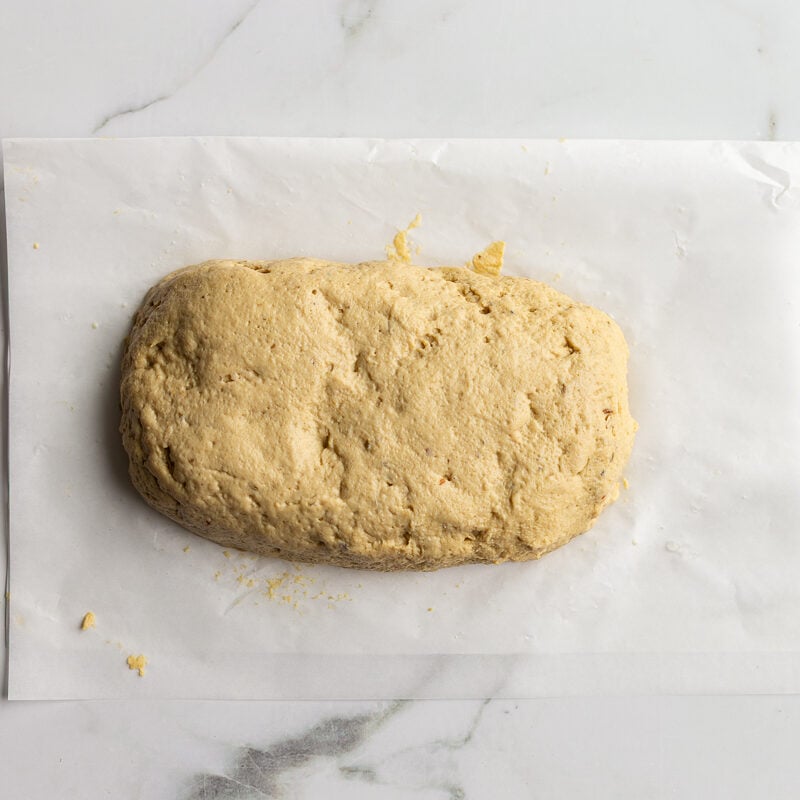
On a piece of parchment paper, form the seitan mixture into a tight, compact loaf approximately 9 inches long by 5 inches wide and 3 to 4 inches tall. Grease a steamer basket and place the loaf on top. Bring a pot of veggie broth to a simmer, add the steamer basket, cover, and steam for 25 minutes. Check periodically to make sure there is always liquid in the pot. Remove from heat and uncover.
Wrap in rice paper
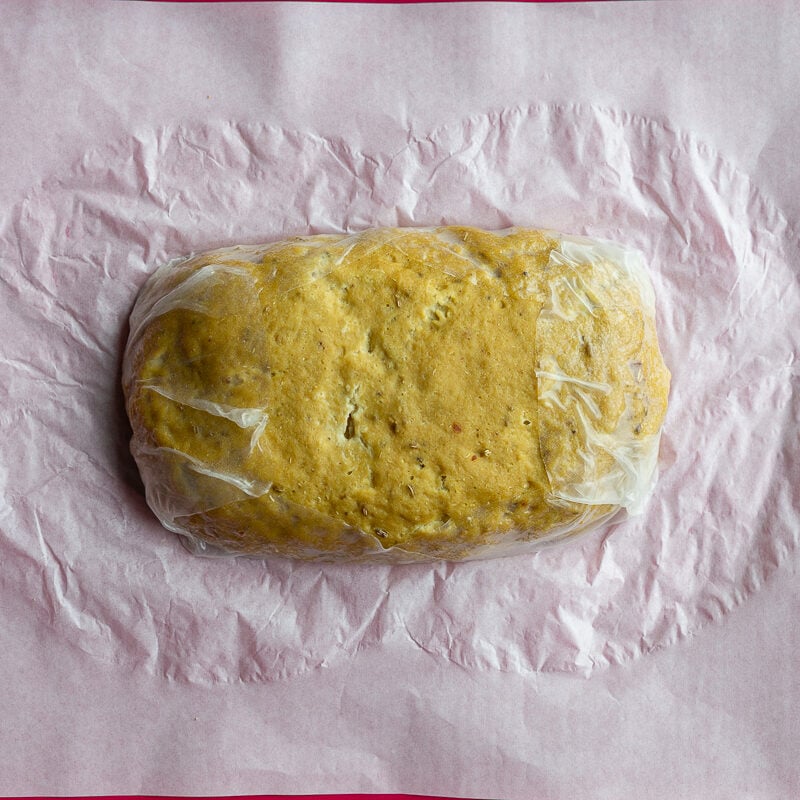
Working one sheet at a time, run each rice paper sheet under water for 10 seconds to soften. Lay two sheets on a piece of parchment paper so they overlap by a few inches in the center. Place the steamed seitan loaf in the middle and wrap the rice paper sheets up and around the sides so they hug the loaf completely. Place the third sheet over the top and wrap it around so the entire surface is covered. This is your crispy skin.
Season and roast
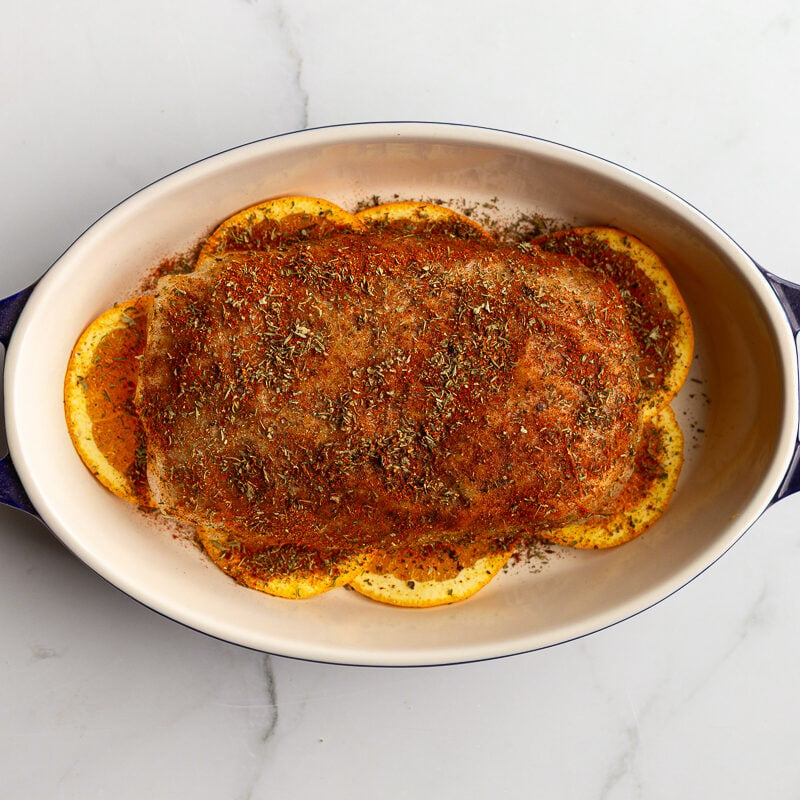
Preheat the oven to 400°F. Grease a roasting dish and, if using, arrange the fresh rosemary sprigs and thin citrus slices across the bottom. Place the wrapped seitan loaf on top. Brush the entire surface generously with olive oil, then sprinkle with salt, freshly cracked black pepper, dried parsley, thyme, and paprika.
Roast, rest, and slice
Roast at 400°F for 25 to 30 minutes until the outside is nicely browned and the rice paper skin is genuinely crispy. Remove from the oven and let rest for several minutes before slicing. The resting time allows the interior to firm up slightly and makes cleaner slices. Serve with your choice of vegan gravy and holiday sides.
The Details That Make This Recipe Work
| ★ | Process the seitan until it fully balls up. This is the most important instruction in the recipe. Under-processed seitan does not develop the right texture. Keep the food processor running until the dough forms a distinct, tight ball. |
| ★ | Use the fennel seeds. The recipe says optional but the depth they add to the flavor is significant. Crushed fennel seeds give the roast a genuine savory quality that makes it taste more like a real holiday centerpiece. |
| ★ | Brush olive oil generously. The oil is what makes the rice paper skin brown and crisp in the oven. Don’t be stingy with it. Cover the entire surface before it goes in. |
| ★ | Let it rest before slicing. Five minutes of resting time makes the difference between clean, defined slices and pieces that crumble at the edges. |
Nutrition Per Serving
| Calories | Protein | Carbs | Fat | Iron | Sodium |
| 181 kcal | 28g | 12g | 3g | 3mg | 438mg |
28 Grams of Protein Per Serving. Zero Animal Products.
This is what sustainable holiday cooking actually looks like: a centerpiece that impresses guests, satisfies protein needs, and costs the planet nothing. Happy cooking.
More SAN Plant-Based Recipes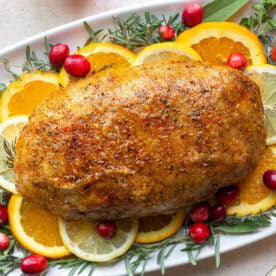
The Vegan Turkey Roast (with crispy skin) is a Food with Feeling Recipe.
Caramelized Bananas
Pan-Fried in Brown Sugar and Cinnamon · 15 Minutes
Over ice cream, over pancakes, or straight out of the skillet. All three are correct.
|
5 min
Prep
|
10 min
Cook
|
15 min
Total
|
251
Cal / serving
|
2
Servings
|
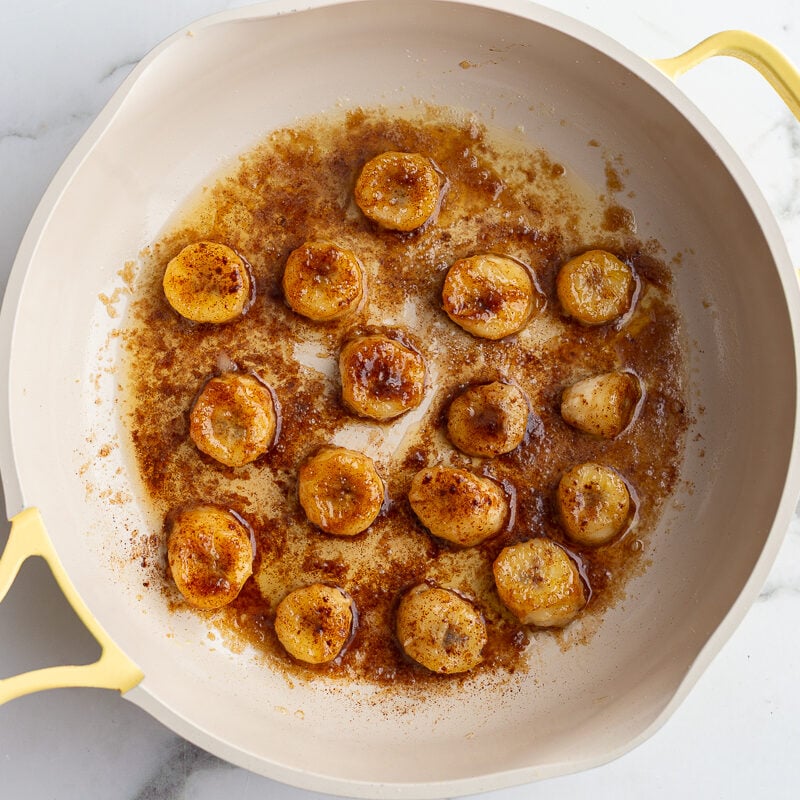
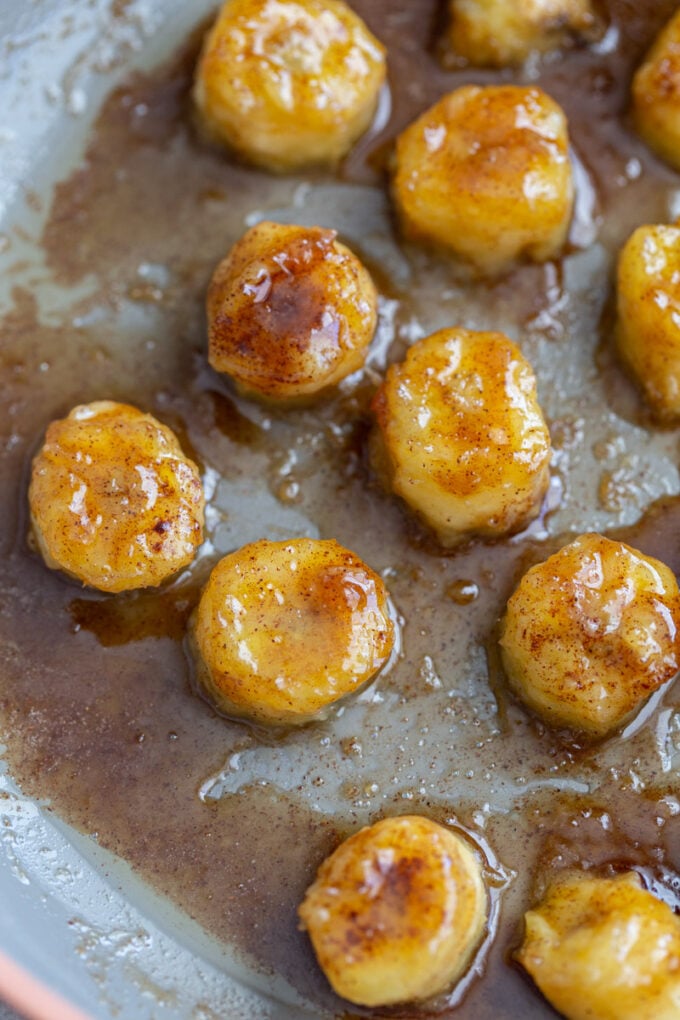
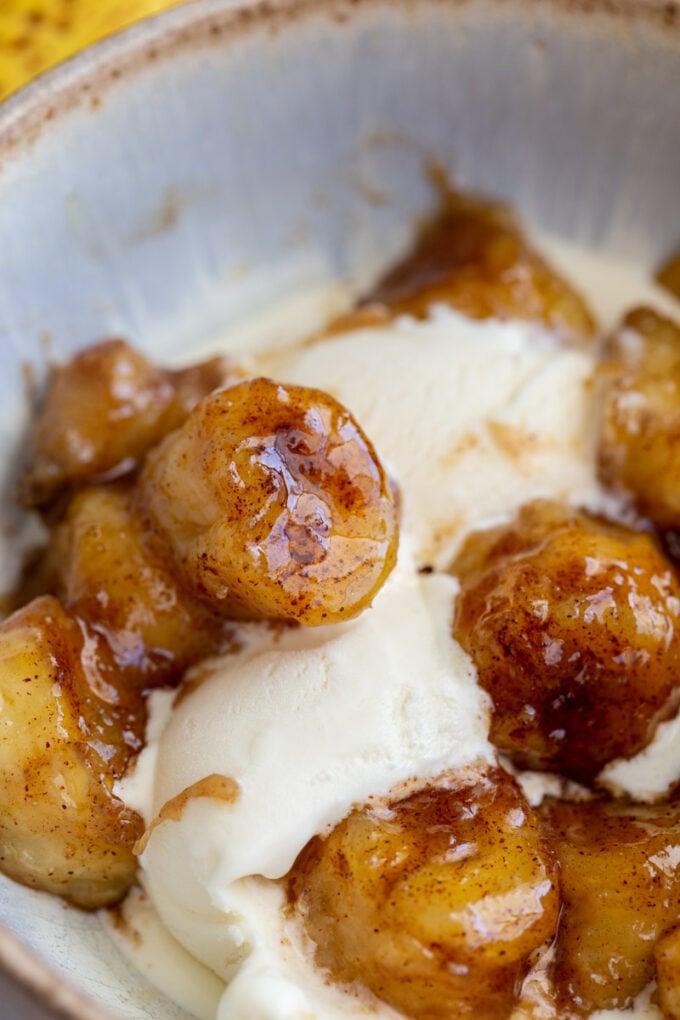
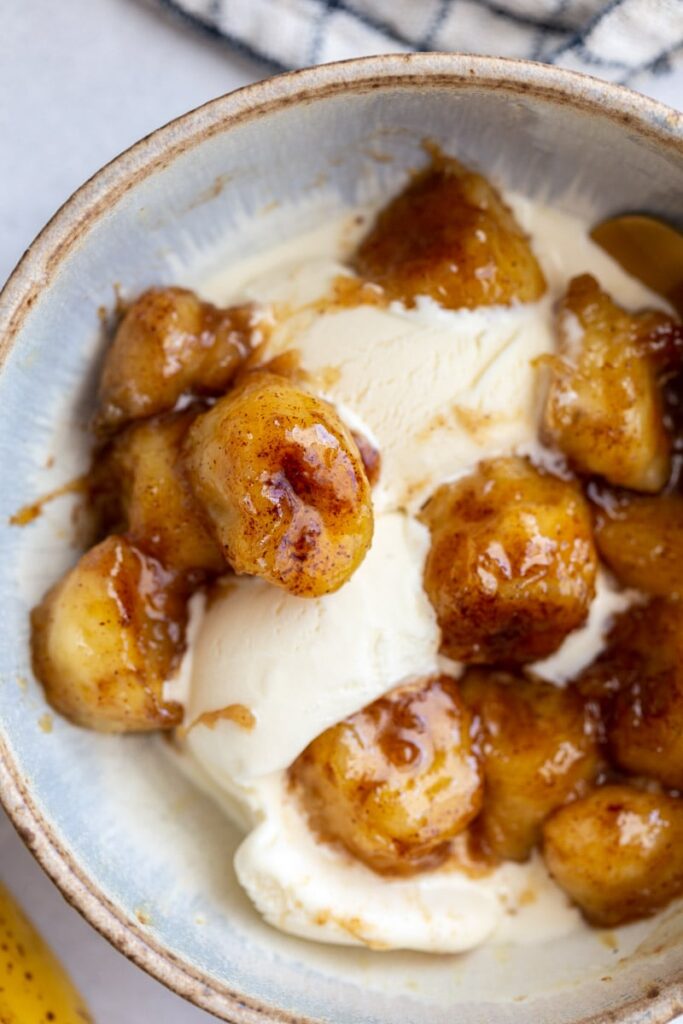
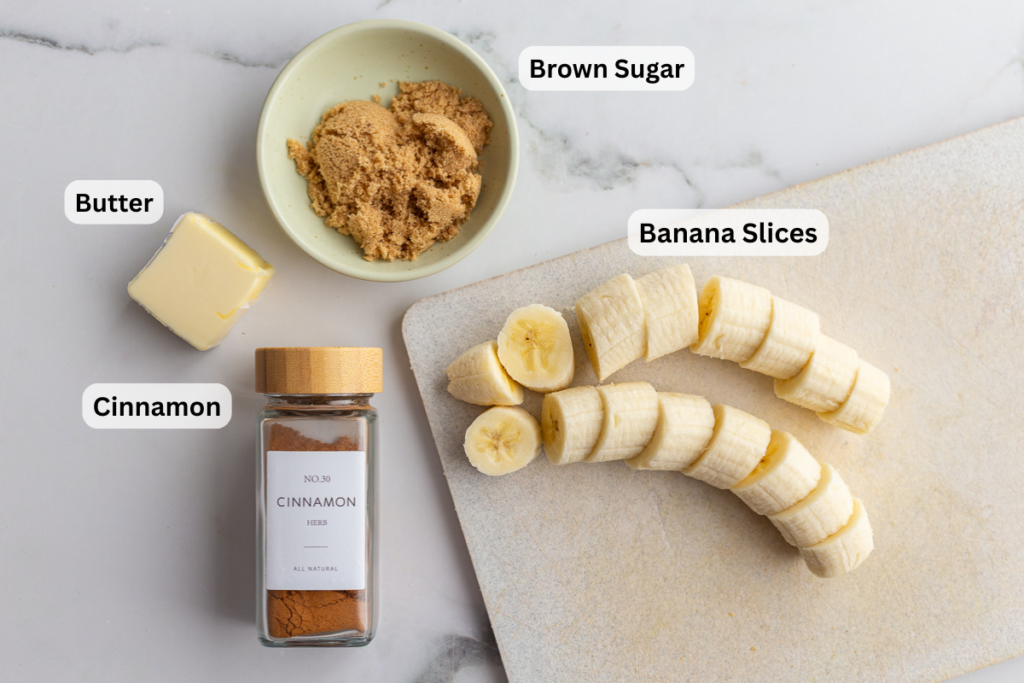
Caramelized bananas are one of those recipes where the gap between how impressive the result looks and how little effort went into it is almost embarrassing. Three ingredients, one skillet, fifteen minutes from start to finish, and you end up with golden, glossy banana slices in a warm brown sugar and cinnamon glaze that could convincingly top a dessert at a restaurant. They also happen to be vegan, which matters to us, and they are genuinely good over everything from vanilla ice cream to breakfast pancakes to a bowl of yogurt with granola.
The banana selection is the one thing that actually matters here. You want bananas that are yellow with a very slight tinge of green and absolutely no brown spots yet. Overripe bananas, the ones you’d use for banana bread, will fall apart in the pan and give you a mushy, formless result instead of the distinct, golden-edged slices this recipe produces. Underripe green bananas are too starchy and won’t develop the sweetness and soft interior the recipe needs. The banana timing window for this recipe is specific: yellow, firm, and not yet spotting.
Ingredients
| Ingredient | Amount | Notes |
| 🍌 Bananas | 2 bananas | Cut into 1-inch thick coins. Must be yellow, not spotted. |
| 🧈 Butter | 2 tablespoons | Coconut oil or vegan butter works perfectly. |
| 🍂 Brown sugar | 2 tablespoons | White sugar also works. Use 1 tbsp for lower calories. |
| 🤎 Ground cinnamon | Generous sprinkle | To taste. Don’t be shy. |
Instructions
Heat the pan and add the bananas
Melt the butter in a medium skillet over medium heat. Once hot, add the banana slices in a single layer so they are not overlapping. Sprinkle the brown sugar and cinnamon evenly over the top and toss gently to coat each slice.
Cook and flip
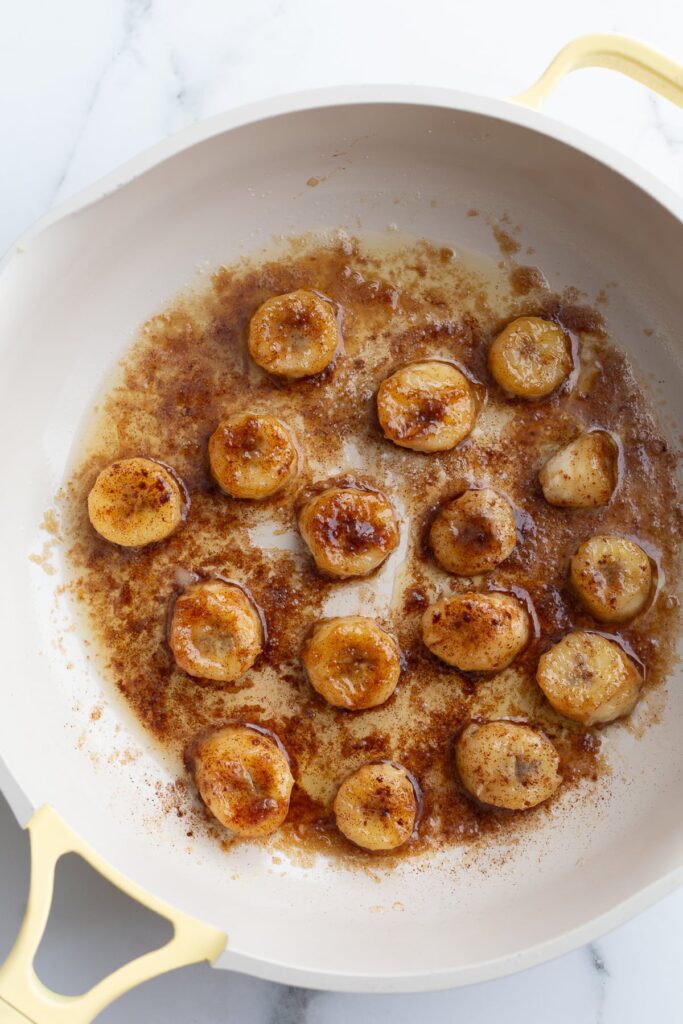
Cook for 4 minutes, then flip each slice carefully and cook for another 3 to 4 minutes until both sides are golden brown and caramelized. Keep an eye on the pan and move the bananas gently to prevent sticking. The sugar caramelizes quickly so stay close.
Serve immediately
Remove from heat and serve right away. Caramelized bananas are at their best hot and fresh from the pan. See the serving ideas below for what to put them on.
Ways to Serve Caramelized Bananas
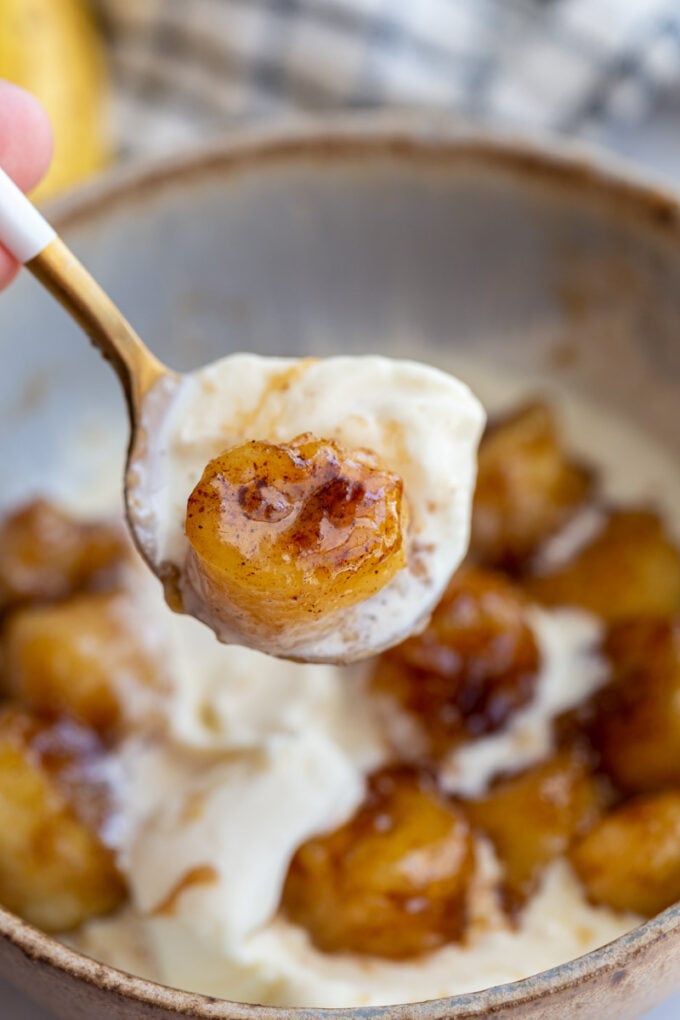
| 🍦 | Vanilla ice cream — the definitive pairing. Warm caramelized bananas over cold vanilla ice cream is not complicated and needs no improvement. |
| 🧇 | Pancakes, waffles, or French toast — skip the syrup and spoon caramelized bananas over the top instead. |
| 🥛 | Yogurt with granola — a breakfast version that feels more indulgent than it is. |
| 🍫 | With whipped cream or caramel sauce — for when you want to commit to dessert. |
| 🍴 | On their own in a bowl — sometimes the simplest serving is the right one. |
Storage
Leftover caramelized bananas can be refrigerated in an airtight container for 1 to 2 days. Reheat in the microwave. They are also quite good eaten cold straight from the fridge, which is not something you would expect but is genuinely true.
Nutrition Per Serving
| Calories | Carbs | Fat | Fiber | Potassium | Sodium |
| 251 kcal | 39g | 12g | 3g | 442mg | 95mg |
More plant-forward recipes and sustainable food ideas on the SAN Recipes page.
More SAN Recipes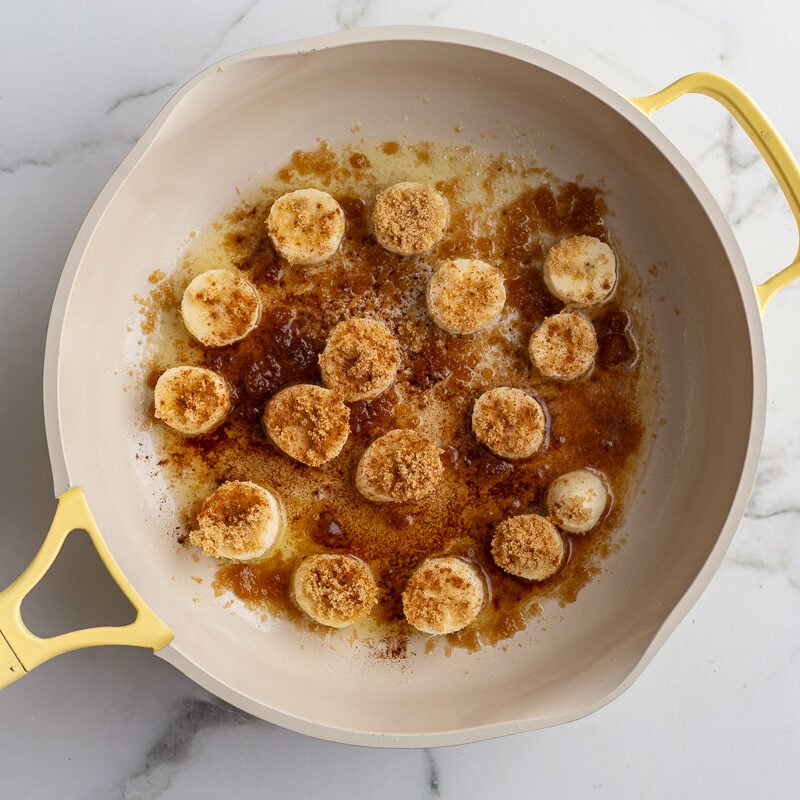

The Caramelized Bananas is a Food with Feeling Recipe.